Hello Blog World.
First off, I can understand if you all are upset that I never wrote out & published an article bout a DIY New Year's Eve projects. While it would of ended the Festivus season nicely, I just didn't have it in me. I even wrote 3/4ths of it, but realized I just wasn't happy with it. Add that to a stressful week and that while I'm planning to have a great party, I don't think I can hold a NYE party that's worth telling the world about.
So I hope you don't mind that I'm taking a moment to sit, think & plan for next year. There is no question that I want to provide an amazing year for Limelight Musings and the fans that read it. I even bought a planner so I can attempt to plan ahead & write great blogs that are worth your time reading. I'm already set to write about post-holiday stuff, pre-garden planning & may even do a monthly entry about a knitting project or cooking recipe.
But at the same time, I want to know want you want to read when you are here. To be honest, while I love writing little snippets every week, I always end up wondering, "does anyone care about this?" I guess I have only my job to blame. For each story in every show, we are pushed to answer "why would anyone care about this?" While some take it a step further by saying the media tell people what to think about, I'm not sure if that applies to my little blog.
Like anyone, I do love talking about myself. I always find little humor or situations in my life to be worth sharing, but I don't want a diary blog. At the same time, I can't push a new a project every week. This last month proved that.
So I guess while I look back on the great seven months we've had so far, I wonder what will push us forward in the years (hopefully) to follow. But a lot of it depends on you out there. Would you like to hear about the life of a news producer in Western Kentucky, or do you want an all project blog? Do you think anything is missing in Limelight Musings? What would you like to see here? While I [try] to write here every week, I feel a bit one-sided & miss what you all have to say about the topic. Let's make this entry a conversation about the great year to come.
To start off on a new, personal note, I wanted to list a few things I did in 2011...
- Started knitting
- Started blogging
- Got a great promotion in the job that got me to Western Kentucky
- Started some amazing friendships
...and a few things I want to do in 2012:
- Grow an herb garden
- Buy a home
- Make home-made lip balm (really excited about that)
- Quit smoking (husband & I plan on 12/21/2012, you know, after the end of the world)
So there you have it, one last blog entry before the end of this year. I plan to ring in the new year with loved ones and hope you do the same. Let's have an amazing 2012 that includes gardening, community & knitting; here's to the new year.
Thursday, December 29, 2011
Monday, December 19, 2011
Festivus: The Joy Of Wrapping
So we are now in the thick of the Festivus; and now that I have all these gifts (homemade & not), I have to figure how to wrap them in a way that helps the earth & my wallet. But there are so many possibilities.
First off, I always save the gift bags & cloth ribbon from the year before. In fact, I still have some ribbon from our wedding. And to make reusing gift bags easier this year, I'm printing & attaching gift tags. That way, there are no stickers you have to worry about removing.
Reusing gift bags & ribbon is one easy way to save on expensive, wasteful wrapping paper. According to Trash Trivia, an additional 5 million tons of waste is generated during the holidays in the U.S. "4 million tons of this is wrapping paper and shopping bags." I try to use cloth shopping bags, and if I do take plastic bags, we store them for later use. And I think some stores like Kroger even take in old bags to be recycled.
As for ribbon, the Clean Air Council reports, 38,000 miles of ribbon is tossed every year. But if you use cloth ribbon, or even the kind with wires, you can reuse it in multiple ways. It's just something to think about.
While I am attempting to make cloth bags & maybe even newspaper gift bags, I plan on making this week's blog easier by sharing some inspiring links. I hope you all don't mind.
There are so many links that provide a pattern for cloth gift bags. Here are some of my favorites:
- DIY Cloth Gift Bags from Wilmington Parent Magazine
- Two Gift Bags At Once from Green Upgrader
- Fabric Gift Bags from Eartheasy
And if you're looking for a simpler, yet artsy way to wrap with cloth, try Furoshiki: Japanese cloth gift wrapping. No sewing required.
Another cool way to wrap gifts is making newspaper gift bags. I found this on pinterst and loved it. I haven't been able to make it yet, but I really want to try it.
So there are a few ways you can be green & creative when wrapping gifts. I really hope you give at least one of them a try. While I am being lazy in this week's post, don't worry, I have big plans for the entry coming up soon. It will most likely be on Tuesday or Wednesday, but believe me friends, it will be worth the wait. I hope that those of you who celebrate Christmas have a merry one this year.
Monday, December 12, 2011
Festivus: Homemade Gifts In Bulk
While some may say that I'm a Grinch, I love giving gifts during the Holidays. While receiving a few gifts is nice (of course), I normally go out of my means to ensure everyone I know and love gets some kind of gift. And that can get expensive. So this year, I swore I would not spend the money I normally do and instead make a bunch of homemade gifts.
I also realize that by reading this, many of my friends & family will now see what they will be getting this year. So if you expect a gift, try not to read. The element of surprise is the price I pay to inform the public of what they can do. You're welcome, world.
Now that I gave that warning, let's get started. I tried to keep things simple and came up with two ideas: dry dog treat jars (for my friends and their wonderful canines) & white chocolate peppermint bark for everyone else outside of immediate family. With ingredients for those two ideas, I can cover a lot of people at a cheap price.
So first, the peppermint bark. Did you know that it is super easy to make? By using this simple recipe by Paula Dean, I made a delicious chocolate peppermint bark while saving the bank on ingredients. In fact, I already had them in my home.
Another perk is that making the bark is a good excuse to use a hammer. I lightly hammered away at a bag full on mini candy canes for the peppermint part.
Making the bark took no more than 10-15 minutes, then I left it in the fridge for a few hours while seeing friends. It turned out great, and since it made about 2 pounds of candy, I should have a lot of friends & family covered.
So I have been planning for months on making the dry dog treat jars for loved ones that allow dogs to run their life. I used the dog biscuit recipe book I bought to find a recipe where the ingredients were (at least mostly) dry so the recipient could easily make the treats. I actually only found two that met that qualification. So I gathered the ingredients in bulk at the local organic store (I'm sure they enjoyed the extra business!) and went to town. In order to fit the ingredients into the jars, I had to tweek the recipe a little bit. Hopefully it'll turn out ok, and just leave the recipient with a smaller batch.
 I also added a few little things to make it special, like a cloth topper with a paw stamp, some yarn, and a tag listing the instructions. By the way, did you know there are loads of websites and blogs that offer free tag templates that you can print off at home? I ended up using this site for ours.
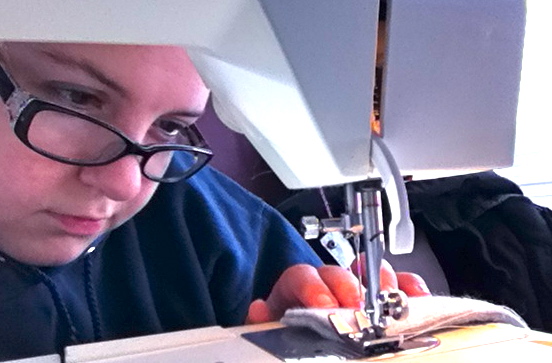
 So over the next month as I ship out and give away these gifts, I'm trying one last bulk gift as a stocking stuffer for immediate family: re-useable hand warmers! I saw this great idea first on pinterest (officially addicted), and had to try it! But instead of sewing hearts, I made boring rectangles so I could make as many as possible with the fabric I had. Plus sewing a small pillow case is quick & easy to do. Most of you should know by now that I'm all about that.
 I actually haven't used a sewing machine in ages, so while I needed a little bit of practice, I could see each hand warmer pattern improve over time. It was also a good learning opportunity for the husband, who wasn't lucky enough to be offered Home Ec. in school. I guess my small farm town school wanted to prepare girls to be stay-at-home moms, not that there is anything wrong with that. But then again, we also took industrial arts (aka shop) in middle school too. Though from what I've heard, both classes were recently cut due to the district's budget (of course).
But these hand warmers are great. The fleece is fuzzy; and with rice, they are reusable. Just pop them in the microwave for a bit (for ours, 50 seconds) and it's hot & ready. You just need to be able to get past the steamy rice smell. Since they are so easy & cheap they are to make, I'm in the process of making a lot.
 So there you have it, three gift ideas that are cheap, easy, and quick. If you decide to try out these gifts, you will get more than just the accomplished "yeah, I made that," feeling. You will also feel the warmth and joy of being able to give to all of your loved ones. There is nothing better than seeing the smile and receiving the hug from a relative that loves the trinket you just gave. Or the soft "thank you" for the small toy you gave your friend's child. I love that feeling. It makes up for all the cruel, cold, and twisted events that I have to read about and report at work.
Now that you've made that perfect gift, let's get to wrapping it. Next week, I will attempt an entry about green gift wrapping. I hope I will be wrapping gifts by then.
I also realize that by reading this, many of my friends & family will now see what they will be getting this year. So if you expect a gift, try not to read. The element of surprise is the price I pay to inform the public of what they can do. You're welcome, world.
Now that I gave that warning, let's get started. I tried to keep things simple and came up with two ideas: dry dog treat jars (for my friends and their wonderful canines) & white chocolate peppermint bark for everyone else outside of immediate family. With ingredients for those two ideas, I can cover a lot of people at a cheap price.
So first, the peppermint bark. Did you know that it is super easy to make? By using this simple recipe by Paula Dean, I made a delicious chocolate peppermint bark while saving the bank on ingredients. In fact, I already had them in my home.
Another perk is that making the bark is a good excuse to use a hammer. I lightly hammered away at a bag full on mini candy canes for the peppermint part.
 |
| Nice. |
 |
| I was able to get the plastic baggies from Hobby Lobby. |


 I actually haven't used a sewing machine in ages, so while I needed a little bit of practice, I could see each hand warmer pattern improve over time. It was also a good learning opportunity for the husband, who wasn't lucky enough to be offered Home Ec. in school. I guess my small farm town school wanted to prepare girls to be stay-at-home moms, not that there is anything wrong with that. But then again, we also took industrial arts (aka shop) in middle school too. Though from what I've heard, both classes were recently cut due to the district's budget (of course).
But these hand warmers are great. The fleece is fuzzy; and with rice, they are reusable. Just pop them in the microwave for a bit (for ours, 50 seconds) and it's hot & ready. You just need to be able to get past the steamy rice smell. Since they are so easy & cheap they are to make, I'm in the process of making a lot.

Now that you've made that perfect gift, let's get to wrapping it. Next week, I will attempt an entry about green gift wrapping. I hope I will be wrapping gifts by then.
Monday, December 5, 2011
Festivus: Quick Dive Into Decor
There is no appropriate adjective to describe how much I love festivus. An that includes all the fun ways to decorate the home. And if you have the time, why not make some of your decor? While I (and my sleep schedule) have been shifted around a lot this week, I was able to get a few things done.
First off, as I mentioned last week, I've been waiting to put together a cute, little advent calender that is similar to the one I found on Mod Podge Rocks. I did a few things different though.
First off, since I knew this post would not be up until a few days into December, I decided to cut down some of the days. And I'm sure I saved a few dollars going with only 12 boxes & a smaller canvas. With a 24" by 36" canvas, I still had plenty of room.
I also went outside the box. The local Hobby Lobby had a great sale on all sorts of little cardboard boxes. So I simply picked out 12, including two larger ones for the first and last day.
I'm sure I also did this with a lot less science and math than I should. Taking a photo of where I wanted things to go was the only pre-meditated preparation I really did. Speaking of preparation, here's what you need:
- 24" by 36'' canvas (Maybe smaller? You pick)
- Acrylic paint: Hunter green, holly red, sap green & white
- Paint brushes (duh.)
- Mod Podge (It's pretty awesome)
- Hot glue gun
- Hot glue (duh. again.)
- 12 boxes (get creative)
- Christmas card stock (I found a sweet set that included stickers)
 So after you get all of the supplies, lets get down to the process. First, I placed (later found out 11, not 12) the boxes on the canvas and marked where the boxes would go. Before you really get started, count and make sure you have all 12. Otherwise, you'll have to try to place a random box out of order.
Next: Painting. Lots and lots of painting. You'll need to paint the canvas one color. I left a bit of white in the spots I wanted the boxes to go as a reminder. While you are at it, paint the sides of the boxes & lids.
After everything is dry, take out the card stock. Use the lids to trace on the card stock to cut out decorative tops to the lids. Then cut out the paper. Then I used a paint brush to apply Mod Podge to the lid tops, then stuck on the card stock. That will need to dry.
When everything is dried out, I painted circles on the lids as background for the numbers. For the two large boxes, I used a "circle box lid" to trace a circle. For the smaller boxes, I think I used a tea candle.

Once that dried, I sketched the painted numbers into the circles, and traced a ring of paint around the circles.
Now that all the boxes are ready, get the glue gun out. And believe me, you will be using lots of glue. I had some difficulty quickly going from gluing the bottom of the boxes then applying to the canvas, so I had to do it a few times. Don't get discouraged.
I applied some of the stickers to the canvas, but I still felt some of the canvas was bare, so I started some free-hand painting.
When everything is dry, then its good enough to hang and stuff with little gifts.


While the advent calender was my main objective, I wanted to show off a few other things I accomplished. Since I spent so much time painting, I also purchased a wooden "B" and painted it with festive Christmas colors to put on display.
 And after seeing it on pinterest, I tried a cute little window decor idea. With one of our old curtain rods, ribbon & large ornaments, we placed a rack of hanging ornaments in our main living room window.
And this design was really easy do. Just needed a little pre-planning, few measurements for the ribbon, and presto! You would be amazed at all the easy things you can do to get your home in the holiday spirit.
First off, as I mentioned last week, I've been waiting to put together a cute, little advent calender that is similar to the one I found on Mod Podge Rocks. I did a few things different though.
First off, since I knew this post would not be up until a few days into December, I decided to cut down some of the days. And I'm sure I saved a few dollars going with only 12 boxes & a smaller canvas. With a 24" by 36" canvas, I still had plenty of room.
I also went outside the box. The local Hobby Lobby had a great sale on all sorts of little cardboard boxes. So I simply picked out 12, including two larger ones for the first and last day.
I'm sure I also did this with a lot less science and math than I should. Taking a photo of where I wanted things to go was the only pre-meditated preparation I really did. Speaking of preparation, here's what you need:
- 24" by 36'' canvas (Maybe smaller? You pick)
- Acrylic paint: Hunter green, holly red, sap green & white
- Paint brushes (duh.)
- Mod Podge (It's pretty awesome)
- Hot glue gun
- Hot glue (duh. again.)
- 12 boxes (get creative)
- Christmas card stock (I found a sweet set that included stickers)
 So after you get all of the supplies, lets get down to the process. First, I placed (later found out 11, not 12) the boxes on the canvas and marked where the boxes would go. Before you really get started, count and make sure you have all 12. Otherwise, you'll have to try to place a random box out of order.
Next: Painting. Lots and lots of painting. You'll need to paint the canvas one color. I left a bit of white in the spots I wanted the boxes to go as a reminder. While you are at it, paint the sides of the boxes & lids.
 |
| Old paper bag = great paint drop cloth |
 |
| I now know the joy that is Mod Podge |

Once that dried, I sketched the painted numbers into the circles, and traced a ring of paint around the circles.
 |
| Sorry, had to get artsty there for a moment. |
I applied some of the stickers to the canvas, but I still felt some of the canvas was bare, so I started some free-hand painting.
 |
| Our cat helping me paint. He totally took over my knee cushion. |


While the advent calender was my main objective, I wanted to show off a few other things I accomplished. Since I spent so much time painting, I also purchased a wooden "B" and painted it with festive Christmas colors to put on display.
 |
| Utilizing the window space |
Monday, November 28, 2011
High Expectations
So, I was originally planning on posting green ideas to wrap your holiday gifts. I even have quite a bit of it written, but I'm not ready to actually wrap my gifts yet. So, this week we will have a blogette to set the mood for my Holiday Theme: Festivus.
While it's still November, I wanted to at least introduce my first holiday theme for this blog. Might as well with all the lights, music & advertising. Jokes aside, the Holidays are my favorite time if year. I even like to encompass all the days (Thanksgiving, St. Lucia, Yule, Christmas, Hanukkah, Kwanza, New Years Eve, etc) and call this time of year "Festivus." I get very merry during Festivus and start baking and buying gifts like a fiend. It's sad, really.
So while I do not have a blog entry for green wrapping ideas, I've been very busy! Here's a snippet of what I've been up to since Thanksgiving:
While I started a knitting project a couple weeks ago, I am continuing the pattern. It will be a Christmas gift!
Speaking of gifts, I made snowflake necklaces last night for two people. I got the idea from pinterest. Here's a link to the original blog entry. It's amazing what you can do with shrinky dinks.
 I had a left over snowflake, so I used it as a trinket for another gift. The idea is from From Glitter To Gumdrops and is a great gift idea for newlyweds. I still need a hook and ribbon, but it's practically good to go. I would post a photo, but I don't want the recipients to see it.
Next week, I plan to cover advent calenders. By doing so, I'm going to show you how I'm making one that's an adaptation from Mod Podge Rocks. With the glue and paint, it takes a bit of time, so I already started working on it. I'm so excited.
And as I mentioned previous, I've been baking a lot. I most recently baked a chocolate pecan pie for Thanksgiving and a breakfast casserole for work. They are delicious.
 And it wouldn't be the Holidays without shopping. And sadly, I was one of the crazy shoppers out Thanksgiving night and through out Black Friday. But in doing so, I got a lot of shopping done. I even got a few "gifts" for myself: A beautiful Kitchen Aid mixer & a gorgeous (and desperately needed) LG dryer. Oh, and the new dryer sings. I may call it Navi. Maybe.
Speaking of new appliances, I'm also having to deal with an unexpected need for a new water heater. Thankfully, we rent our home, so our landlord will be nice enough to purchase said heater. Maybe now I can more accurately adjust it for energy efficiency.
 Lastly, tis the season for Festivus, so why not get a festive Christmas tree? While I normally try to shop locally, we caved in a bought a huge scotch pine tree for a great price at the local Home Depot. They even threw in a few free boughs from other trees that would of ended up in the dump. Making my own wreath will be even easier now. I plan to show you have to do that later.
All of these great activities is paired with some good work news. I've recently been promoted to produce our local 6p.m. show. So I will be working "regular" shifts Monday through Friday... normally. With a few co workers needing to be off, we are currently playing the producer shuffle. So one day I'll do the 6 p.m., next will be the Midday show, followed by a morning shift. So much for regular hours, ha. But it is still great news and the hours are something many in my field would die for.
Yet, I also am in the process of saying goodbye to one of my best friends in Kentucky. It was a pleasure to even meet Jennifer, much less get to know the crazy, loving & strong woman that she is. She is moving on to better things, but I will miss her deeply.
And while it's not Christmas yet, I seem to be accumulating gifts at my work desk. Last week a coworker gave me a huge Aloe Vera plant followed by a beautiful winter rose poinsettia from my mother-in-law. After getting back from Thanksgiving break, I now have a carton of eggs which were raised from another co-workers farm. I could get use to this.
 So I hope you are not too disappointed that I don't have a full blog entry pertaining to green gift wrapping. But not only will I soon cover gift wrapping ideas, but there are so many great Holiday gift ideas & crafts that I can't wait to share.
While it's still November, I wanted to at least introduce my first holiday theme for this blog. Might as well with all the lights, music & advertising. Jokes aside, the Holidays are my favorite time if year. I even like to encompass all the days (Thanksgiving, St. Lucia, Yule, Christmas, Hanukkah, Kwanza, New Years Eve, etc) and call this time of year "Festivus." I get very merry during Festivus and start baking and buying gifts like a fiend. It's sad, really.
So while I do not have a blog entry for green wrapping ideas, I've been very busy! Here's a snippet of what I've been up to since Thanksgiving:
While I started a knitting project a couple weeks ago, I am continuing the pattern. It will be a Christmas gift!
 |
| It's psychedelic, man! |

Next week, I plan to cover advent calenders. By doing so, I'm going to show you how I'm making one that's an adaptation from Mod Podge Rocks. With the glue and paint, it takes a bit of time, so I already started working on it. I'm so excited.
And as I mentioned previous, I've been baking a lot. I most recently baked a chocolate pecan pie for Thanksgiving and a breakfast casserole for work. They are delicious.

 |
| This is the old dryer. It was free, but at a price. Now it's dead to me. |
 |
| Sweet. |
Lastly, tis the season for Festivus, so why not get a festive Christmas tree? While I normally try to shop locally, we caved in a bought a huge scotch pine tree for a great price at the local Home Depot. They even threw in a few free boughs from other trees that would of ended up in the dump. Making my own wreath will be even easier now. I plan to show you have to do that later.All of these great activities is paired with some good work news. I've recently been promoted to produce our local 6p.m. show. So I will be working "regular" shifts Monday through Friday... normally. With a few co workers needing to be off, we are currently playing the producer shuffle. So one day I'll do the 6 p.m., next will be the Midday show, followed by a morning shift. So much for regular hours, ha. But it is still great news and the hours are something many in my field would die for.
Yet, I also am in the process of saying goodbye to one of my best friends in Kentucky. It was a pleasure to even meet Jennifer, much less get to know the crazy, loving & strong woman that she is. She is moving on to better things, but I will miss her deeply.
 |
| Love you JHo. |

Monday, November 21, 2011
Novem-brr: Put A Battery In It!
I'm ending our month theme today with a few last things you should get done before winter really kicks in for the year: checking smoke detectors and doing what you can to avoid carbon monoxide poisoning.
Winter can be a dangerous time when it comes to carbon monoxide. In a report last year, the CDC found the highest amount of people going to the ER for carbon monoxide poisoning is in January. This is mostly thanks to improper ventilation for gas furnaces, ovens, vehicles, and portable generators. And it's not a matter to take lightly. In fact, carbon monoxide is considered a "silent killer." The CDC also reports about 20,000 people annually go to the ER because of carbon monoxide poisoning each year, and about 500 people die from it annually.
Now that I've gotten your attention, there are some really simple things to keep you safe. First, purchase or check the carbon monoxide detector in your home. 24 states, including my home state Illinois, have some sort of law regarding installing detectors. There are various companies that make detectors, just be sure it can run on a battery for back up. And since you spend most of your time at night, it's important to have detectors in the bedroom.
There are ways to avoid carbon monoxide poisoning in your home. First, your oven and gas furnace. If you have a gas oven or furnace, make sure it has proper ventilation. And if you have a gas oven, but electric heating, do not use the oven to heat your home if you run out of power. If you just moved into a home, it would be wise to have a professional look at both to make sure there is proper ventilation and maintenance in your new dwelling.

The chimney is another big culprit to cause carbon monoxide poisoning. Its hard to tell if you have a blocked chimney, and the there a several poisonous gases that emit from the fire. If you have a wood burning chimney, creosote is a dangerous thing to look out for too. If you do not clean your chimney occasionally to knock out the residual tar, it can cause a chimney fire.
I hate getting into a cold car as the next girl, but if you need to heat up your vehicle, be sure there's proper ventilation. That means it has to come out of the garage, or at least have the garage door open, when warming up and running.
And lastly, there's the gas generator. My new home was hit by a terrible ice storm a couple years ago. So needless to say, a lot of people recently invested in at home generators. But by burning gas, a generator can create a lot of poisonous exhaust. So unless it's actually installed into your home with proper ventilation, it needs to be as far away from your home as possible.
 But along with a carbon monoxide detector, you also need to check your smoke detectors. With the additional lights and ornaments we install during the holidays, a spark can easily turn into tragedy. According to the U.S. Fire Administration, there are more than a half million winter fires each year. Those fires annually cause $3 billion in property loss, 1,900 deaths, and nearly 8,000 injuries. Most local news organizations use our "fall back" of daylight saving time as a reminder to check smoke detectors. So if you haven't yet, you need to now. Twice a year, you should test the detector and change out the batteries. Also use it as an opportunity to make a fire & emergency plan with your family.
So I hope you feel that you are better informed about the legit dangers that can happen during the winter months. None of the issues above should be taken lightly, and have taken the lives of others. It's been fun to show you the great ways you can prepare for the long winter nights coming upon us. But, I'm really looking forward to sharing some great DIY, green gift ideas for the holiday season. In fact one blog friend, Roxy, has jumped on board and already published a great post about making home made soap as a gift!
Oh and if you'd like a preview to what I'm thinking about trying out, check out my pintrest board. I've even posted a board that's dedicated to the Holidays (what I like to call "Festivus"), so be sure to check it out.
Tuesday, November 8, 2011
Novem-brrr: Avoid The Draft
And no, I don't mean getting out of the military draft during war times (though that can easily be solved by high tailing it to Canada).
No, this week we are going to cover the ways you can better insulate your home for the cold winter months. By doing so you are keeping your home toasty, allowing your furnace to work more efficiently, and saving energy (plus energy costs).
Though I do believe insulating your stomach with cotton balls was one rumored way to getting out of the Vietnam War draft.
And to show you what you are looking for, the husband and I made a little photo op at a local home-improvement store.
One of the best ways to avoid the draft in your home is to seal up the house. If your dwelling is older like ours, it probably has a lot of cracks and openings. That is allowing the heat to escape.
One of the easiest cracks to find is along your windows & doors. An easy way to find leaks is the candle test: light a candle and follow along the edges. If the candle flickers, there's a draft. And there are two easy, cheap ways to seal those doors & windows: weather stripping & plastic insulation.
 Weather stripping can include foam tape, door sweeps, even those awesome twin door guards. I have to say installing the foam tape and twin door guard are super easy to do. You simply tape the foam tape along the opening of the door and window. As for the twin guard, you place the foam tubes in the sleeves & slide under the door. The door sweeps all depend on what kind you use.
You can also apply the plastic insulator for windows; it looks like plastic wrap. When properly applied, the practically invisible sheet can save you money on the utility bill. Creative Homeowner shows a great step by step way to install the plastic that I'm too lazy to do.
You should also try to seal the other cracks around the home. We have so many cracks around our old home, I can't even count them. Once again, you'll use the candle test along possible areas. Under the window sill is a big culprit in our home. After you've identified the leaks, use the tube-in-a-can gun to squirt small amounts of foam to fill in the crack.
There is one more big way you can boost your energy savings: attic insulation! Only about 20% of homes built before 1980 have proper insulation. And installing that proper insulation will improve the efficiency of your furnace, reduce your energy bill, and even boost the value of your home!
Winterizing your home in general helps the environment, your home, your comfort, and your wallet. But by avoiding the draft, those perks are increased. And since these ways are so easy to do, you'd be crazy to not battle the draft.
We only have one more week of winterizing your home before I start our holiday season. I really can't wait to start covering the great gift and craft ideas I have, but there is one more thing you should check before winter gets too serious. Next week see the few steps you can take that could possibly save your life.
Oh, and can I just say I'm addicted to pinterest? Be sure to check out my board and see all the crafts that I hope to try and share with you.
No, this week we are going to cover the ways you can better insulate your home for the cold winter months. By doing so you are keeping your home toasty, allowing your furnace to work more efficiently, and saving energy (plus energy costs).
Though I do believe insulating your stomach with cotton balls was one rumored way to getting out of the Vietnam War draft.
And to show you what you are looking for, the husband and I made a little photo op at a local home-improvement store.
One of the best ways to avoid the draft in your home is to seal up the house. If your dwelling is older like ours, it probably has a lot of cracks and openings. That is allowing the heat to escape.
One of the easiest cracks to find is along your windows & doors. An easy way to find leaks is the candle test: light a candle and follow along the edges. If the candle flickers, there's a draft. And there are two easy, cheap ways to seal those doors & windows: weather stripping & plastic insulation.
 Weather stripping can include foam tape, door sweeps, even those awesome twin door guards. I have to say installing the foam tape and twin door guard are super easy to do. You simply tape the foam tape along the opening of the door and window. As for the twin guard, you place the foam tubes in the sleeves & slide under the door. The door sweeps all depend on what kind you use.
You can also apply the plastic insulator for windows; it looks like plastic wrap. When properly applied, the practically invisible sheet can save you money on the utility bill. Creative Homeowner shows a great step by step way to install the plastic that I'm too lazy to do.
You should also try to seal the other cracks around the home. We have so many cracks around our old home, I can't even count them. Once again, you'll use the candle test along possible areas. Under the window sill is a big culprit in our home. After you've identified the leaks, use the tube-in-a-can gun to squirt small amounts of foam to fill in the crack.
 |
| The husband modeling at the home improvement store |
 |
| Lotsa' insulation... I don't know why it's so fuzzy. |
We only have one more week of winterizing your home before I start our holiday season. I really can't wait to start covering the great gift and craft ideas I have, but there is one more thing you should check before winter gets too serious. Next week see the few steps you can take that could possibly save your life.
Oh, and can I just say I'm addicted to pinterest? Be sure to check out my board and see all the crafts that I hope to try and share with you.
Monday, November 7, 2011
New Theme: Novem-brrr
Hello folks- it's a new month, so that means a new theme! As winter starts to blow in, we will cover some green ways to prepare your home for the cold weather. Not only will we discuss ideas good for the earth, but also your wallet by lowering heating costs!
And to start things off right, here are some quick, easy things you should do before it gets too cold.
 - Change the Air Filter
You should actually have your entire furnace checked every fall, but changing the air filter is key. It helps your furnace perform better, which means it needs less energy; and therefore, it reduces your monthly bill. It also helps the air in your home stay clean. Changing your filter should be a seasonal task, but a good reminder is when you need to turn the furnace on during chilly, autumn days.
- Reverse Ceiling Fans
During the summer, your fan rotates counter-clockwise to bring a breeze to your home. But in the winter time, your fan needs to rotate clockwise. Warm air naturally rises, but having your fan rotate the proper direction will improve air circulation and bring the heat down from the ceiling. And with the air evenly heated, your furnace will have to work less to heat your home. The Daily Green credits a ceiling fan rotating clockwise can save you 10 percent on your monthly energy bill.
- Caring for the Water Pipes
 Pipes freezing and bursting with water is a huge problem that can be easily avoided. First, you'll want to tend to your outside water sources. Make sure the garden hose is completely drained. If you can, turn off the water to any sources that you will not be using during the winter months. For the hose bibs, turn off the inside valve, but keep the outside tabs open so if there is excess water, it can leak out.
As for pipes inside the home, if they are close to an outside wall, they need to be insulated. Insulating all your pipes will cut on your energy bill too, since it will take less energy to keep the water in the pipes warm. But another good way to prevent frozen pipes on a really cold night is to open up your cupboard doors under the sink to allow pipes access to heated air.
- Turn Down Water Heater
I love a nice hot shower as much as the next person, I don't think I need it as hot as most heaters are set at by installers. Also according to The Daily Green, most conventional water heaters are set to 140 Degrees Fahrenheit. The site also claims lowering the temperature to 120 degrees (or lower) would reduce your water heating costs by 6-10%. Our water heater is apparently so old that there is not a temperature setting, just a warm and hot.
- Checking the Ducts
Your comfort in the summer or winter time depend on the air ducts in your home. And if your home is as old as mine, there is a chance that air is leaking from those ducts. Those leaks not only mean loss of air at valued temperature, but it means your air conditioner and furnace have to work harder (aka higher utility bill). So if you take the time to have a professional look at your furnace, might as well have one to check the ducts and vents of your home. Various studies show you could save up to 10% on your energy bill by fixing leaks.
One thing you can do outright is to check the vents in each room of your home. Make sure they are not blocked in any way. Make sure all the vents are open. As The Simple Dollar explains, closing the vents in an "unused" room really doesn't save you in the end.
So there you have it, 5 easy ways to prepare your home for the upcoming winter. Sorry if it seemed a bit boring and without many photos. Next week, I'll cover the ways you and your home can avoid the chilly draft.
Monday, October 31, 2011
All About Pumpkin: Fun for Kids & Adults!
Well, kids, October is wrapping up, which also means our pumpkin-themed month is coming to an end. In the spirit of today being Halloween, I'll cover a couple uses for hollowing out a pumpkin.
Of course there is your normal Jack O' Lantern, which is a well held tradition for families. Did you know the American tradition actually comes from Ireland? There, they used to carve out & decorate turnips & potatoes. But when the Irish came to America, they found that the native pumpkin was easier to use. A few of my friends made Jack O' Lanterns this year. Aren't they cute?


But being the progressive adult that I am, I did not. Instead, I made a super-adult-ish pumpkin air freshener. I guess this is where I admit that, for one, there's not much of a difference, mine is just more "adultish." And secondly, I once again took inspiration from Care 2, who in turn stole it from Martha Stewart. But all is fair in love and blogging.
Just like every other pumpkin carving scenario, you'll pick out a pumpkin, cut off the top, and scoop out the guts. My husband really enjoyed the last part. Be sure to save those seeds, we'll get to those later.
 After you get all the yucky stuff done, like most Jack O' Lanterns,
you'll pick out a design, and sketch the design onto the pumpkin. The
easiest way I found was to print out the design, pin it to the pumpkin
& poke holes along the lines. We don't have the
fancy-schmancy carving tool kit, so I used an ice pick.
After you get all the yucky stuff done, like most Jack O' Lanterns,
you'll pick out a design, and sketch the design onto the pumpkin. The
easiest way I found was to print out the design, pin it to the pumpkin
& poke holes along the lines. We don't have the
fancy-schmancy carving tool kit, so I used an ice pick.
Then you will start cutting. This has been a low-budget project since the beginning, so we used a few knives that we have at home.

I was not expecting it to go well, but it looked great. And while the husband was cutting in a few extra diamonds, I started on the one part that makes this different than a regular Jack O' Lantern: the spices. Basically, you'll want to rub some of your favorite fall spices into the inside of the topper. I chose some cinnamon, nutmeg & cloves. If you want vanilla, do not use extract, just get some vanilla beans.


After that is all said and done, you're finished. Stick a candle in the pumpkin, light it up and turn off the lights.

Not only do you have a centerpiece for your autumn decor, but the candle & spices will fill your home with the aroma of autumn. Well, mine smells more like Christmas now, but you get the point.
Just because I'm so proud of my carving, I'm throwing in another photo. I should mention that before you carve, you'll want to wash your pumpkin with bleach & hot water to kill outside germs. I unfortunately did not and my pumpkin started rotting within a week.
So, after you get your air freshener set up, you can now tend to the seeds. Previously, I have covered the nutritional goodness of pumpkin seeds. And many of us know the best way to eat them is roasted.
So (obviously) you will want to clean the seeds first. I just used our strainer and gently hand washed the seeds. While that is going, melt down a tablespoon of butter, set your oven to 200 degrees, and prepare a cookie sheet with some foil.
Then you will spread the seeds onto the cookie sheet while pouring the butter over the seeds. The secret is to keep the seeds from over lapping. We added a little garlic salt, then stirred/spread the seeds out a little more before popping them in the oven.

I have to be honest, I really didn't record a time on these, we just kept a close eye and stirred around occasionally. It was a good 10 minutes or more though. You'll want to take them out after they are nice and golden brown. Once ready, take them out, let them cool, and enjoy.
I should also add when your Halloween is over and your pumpkins starts to rot (like mine), be sure to throw it in the compost pile. Mixed in with the fallen leaves in your yard, you'll have a great compost for your garden next year.
So I guess that's it, that ends our pumpkin-themed month. It's bittersweet. While I'm ready to cover other topics, I really enjoyed sharing my love for pumpkin. I hope some of you are now inspired to include a little pumpkin in your life.
And if you've like the month-long theme, never fear, I have scheduled themes for the rest of the year. Next month, I'll cover how to prepare your home for winter. It will not only help the environment, but also your wallet. See you all next week.
 |
| Yummy. |


But being the progressive adult that I am, I did not. Instead, I made a super-adult-ish pumpkin air freshener. I guess this is where I admit that, for one, there's not much of a difference, mine is just more "adultish." And secondly, I once again took inspiration from Care 2, who in turn stole it from Martha Stewart. But all is fair in love and blogging.
Just like every other pumpkin carving scenario, you'll pick out a pumpkin, cut off the top, and scoop out the guts. My husband really enjoyed the last part. Be sure to save those seeds, we'll get to those later.
 |
| I'm not sure if he thoroughly enjoys dismembering pumpkins or just wanted an excuse not to do homework. |
 |
| End result. |
 After you get all the yucky stuff done, like most Jack O' Lanterns,
you'll pick out a design, and sketch the design onto the pumpkin. The
easiest way I found was to print out the design, pin it to the pumpkin
& poke holes along the lines. We don't have the
fancy-schmancy carving tool kit, so I used an ice pick.
After you get all the yucky stuff done, like most Jack O' Lanterns,
you'll pick out a design, and sketch the design onto the pumpkin. The
easiest way I found was to print out the design, pin it to the pumpkin
& poke holes along the lines. We don't have the
fancy-schmancy carving tool kit, so I used an ice pick.Then you will start cutting. This has been a low-budget project since the beginning, so we used a few knives that we have at home.

I was not expecting it to go well, but it looked great. And while the husband was cutting in a few extra diamonds, I started on the one part that makes this different than a regular Jack O' Lantern: the spices. Basically, you'll want to rub some of your favorite fall spices into the inside of the topper. I chose some cinnamon, nutmeg & cloves. If you want vanilla, do not use extract, just get some vanilla beans.

After that is all said and done, you're finished. Stick a candle in the pumpkin, light it up and turn off the lights.

Not only do you have a centerpiece for your autumn decor, but the candle & spices will fill your home with the aroma of autumn. Well, mine smells more like Christmas now, but you get the point.
 |
| See the spices? |
 |
| Bam! But now it's rotting :( |
 |
| You certainly don't want to eat them like this. |
Then you will spread the seeds onto the cookie sheet while pouring the butter over the seeds. The secret is to keep the seeds from over lapping. We added a little garlic salt, then stirred/spread the seeds out a little more before popping them in the oven.

I have to be honest, I really didn't record a time on these, we just kept a close eye and stirred around occasionally. It was a good 10 minutes or more though. You'll want to take them out after they are nice and golden brown. Once ready, take them out, let them cool, and enjoy.
 |
| Ready for Om Nom Nom-ing |
So I guess that's it, that ends our pumpkin-themed month. It's bittersweet. While I'm ready to cover other topics, I really enjoyed sharing my love for pumpkin. I hope some of you are now inspired to include a little pumpkin in your life.
And if you've like the month-long theme, never fear, I have scheduled themes for the rest of the year. Next month, I'll cover how to prepare your home for winter. It will not only help the environment, but also your wallet. See you all next week.
Thursday, October 27, 2011
All About Pumpkin: Pumpkin Body Butter
For years, I've touted how good pumpkin is for you. Who knew it's also great for your skin?!
In case you missed here, here's why you may soon want to try the recipe I'm about to share. But I'm about to share a great, simple recipe for a pumpkin body butter! All you will need is:

1/2 c pumpkin puree
1/2 c coconut milk
1/2 tsp ground cinnamon.
You simply mix the ingredients together. Then apply it to the skin, wait 10 minutes, rinse & dry. This recipe not only offers a great smell, but will give your skin moisture, a boost of vitamins and provide an antibacterial treatment. I loved this body butter and so did my friend, Roxy!
I hope you can enjoy these great uses for pumpkin, especially
with our pumpkin theme coming to a close. Tune in next week for my last few tips
to enjoy pumpkin in your home!
In case you missed here, here's why you may soon want to try the recipe I'm about to share. But I'm about to share a great, simple recipe for a pumpkin body butter! All you will need is:

1/2 c pumpkin puree
1/2 c coconut milk
1/2 tsp ground cinnamon.
You simply mix the ingredients together. Then apply it to the skin, wait 10 minutes, rinse & dry. This recipe not only offers a great smell, but will give your skin moisture, a boost of vitamins and provide an antibacterial treatment. I loved this body butter and so did my friend, Roxy!
 |
| Weird angle, I know. |
 |
| Apparently you can also shave with it! |
Monday, October 24, 2011
All About Pumpkin: Pumpkin Facial Scrub
Greetings blog-ett-ers! Let's jump back
in to the great uses of the amazing gourd we call pumpkin. Today, I'm going to
show you two ways to utilize the vitamins in pumpkin to help your skin. It's
also a good excuse to spoil yourself with some left over pumpkin puree. I should
admit that I stole both of these ideas from Care2 's 11 Uses For Pumpkin.
First let's cover how pumpkin can benefit your skin. As mentioned when I started this pumpkin venture, pumpkin is chock-full of "good stuff." Below is a nutritional list of what's in pumpkin, and what it means for your skin.
Vitamin C: antioxidant that increases production of collagen, a component in cell growth and repair in your skin
Vitamin E: antioxidant that protects and repairs your skin
Vitamin A: another antioxidant that helps your immune system and create/maintain epithelial cells
Zinc: helps repair cells throughout your body, may also help prevent acne, dandruff & diaper rash
Alpha Carotene: antioxidant; used to make Vitamin A, may slow the aging process
Beta Carotene: antioxidant; also used to make vitamin A, helps fight against UV light-caused skin aging
Potassium: increases cell production; without it, skin becomes dry
Lutein: another carotene/ antioxidant; it can increase skin hydration, elasticity and skin lipid content
So now that you know how pumpkin helps your skin, let's see how you can use it! How about a nice pumpkin honey exfoliate? All of these ingredients have great nutritional value for your skin, especially if organic. For it, you'll need :
 1 tsp of brewed green tea
2 tsp of pineapple puree
4 Tbs of pumpkin puree
1 Tbs of honey
2 tsp aloe vera gel
1/2 tsp jojoba oil
6 tsp of yellow cornmeal
Once you have the ingredients, it's a pretty simple recipe, just mix all the said ingredients together. You'll eventually get a mixture that looks like a bona fide facial scrub!
 As with any exfoliate, apply a small dab to the forehead,
cheeks & chin. Rub the mixture on the skin in a circular motion. Wash off,
dry face and apply moisturizer (I will get to that in a moment).
As with any exfoliate, apply a small dab to the forehead,
cheeks & chin. Rub the mixture on the skin in a circular motion. Wash off,
dry face and apply moisturizer (I will get to that in a moment).
Unfortunately, I did not have enough cornmeal at first (don't
worry, I upped it in the recipe), so hopefully your result will look better than
mine.
First let's cover how pumpkin can benefit your skin. As mentioned when I started this pumpkin venture, pumpkin is chock-full of "good stuff." Below is a nutritional list of what's in pumpkin, and what it means for your skin.
Vitamin C: antioxidant that increases production of collagen, a component in cell growth and repair in your skin
Vitamin E: antioxidant that protects and repairs your skin
Vitamin A: another antioxidant that helps your immune system and create/maintain epithelial cells
Zinc: helps repair cells throughout your body, may also help prevent acne, dandruff & diaper rash
Alpha Carotene: antioxidant; used to make Vitamin A, may slow the aging process
Beta Carotene: antioxidant; also used to make vitamin A, helps fight against UV light-caused skin aging
Potassium: increases cell production; without it, skin becomes dry
Lutein: another carotene/ antioxidant; it can increase skin hydration, elasticity and skin lipid content
So now that you know how pumpkin helps your skin, let's see how you can use it! How about a nice pumpkin honey exfoliate? All of these ingredients have great nutritional value for your skin, especially if organic. For it, you'll need :
 1 tsp of brewed green tea
2 tsp of pineapple puree
4 Tbs of pumpkin puree
1 Tbs of honey
2 tsp aloe vera gel
1/2 tsp jojoba oil
6 tsp of yellow cornmeal
Once you have the ingredients, it's a pretty simple recipe, just mix all the said ingredients together. You'll eventually get a mixture that looks like a bona fide facial scrub!

 |
| Yep, hair is still purple. |
Subscribe to:
Posts (Atom)