Showing posts with label Garden. Show all posts

Monday, March 17, 2014

Pre-Spring Prep

Hello my lovlies- it's been awhile, hasn't it? Thankfully, it's because I've been a very busy lil' bee. I can't wait to tell you all about it!

I have to admit, I lose inspiration to write from January - March. The holidays are over, winter recipes become a rut, and you can only do so much outside with freezing temperatures, snow, and ice. Then mid-March comes along and BAM! Garden ideas, house projects, and fresh produce get my "muse" back on track!

Speaking of mid-March- it's that time of year again. Where I get a week (or two if I'm lucky) to prepare this year's garden before allergy season is in full bloom. I know many of you are itching to rush to your nearest nursery and pick out your favorite herbs, flowers, and plants. There at lot of work to get done before you start digging away in your pots & garden beds though.

The last remaining days of winter/beginning of Spring is the ideal time to prepare your garden. now that all the snow is gone, you have to get your yard in order for this year's planting. First off, if you haven't already, you need to prune. We normally hold off until this time of year because I find it easier to cut everything back after it's dried out through out the winter. Some plants do prefer to be pruned before winter though. You just need to research your perennials.
I greatly cut back our butterfly bush. It looks sad, but just give it a few weeks.


For several perennials, you simply need to cut back what's dead. That's especially the case for several bulbs like echinacea and lilies.

While you are pruning, also clear out your flower bed. Remove leaves, branches, and the beginning of weeds. Not only does this tidy up your garden, but it also prevents attracting any kind of pest that is attracted to debris.

While it's still too early for several plants, you can start a few by seeds about now. It maybe too early to sow in the ground though. About the earliest you can start (depending on your temperate zone) is April. I couldn't help myself though. I started a few of my own seed pods.
Sadly, last year's attempt at growing seeds from the newspaper pods didn't go so well. I'm trying two new approaches this year though. Above is using biodegradable egg cartons filled with soil & seeds. Below are toilet paper rolls cut in half. If both work correctly, I should eventually be able to plant each pod into the ground when ready. We shall see! Here are some more tips on growing seeds from the Old Farmer's Almanac.

Side note: I did not lay the pans with paper towels or newspaper this year. I think it may have attracted mold last year. I'm also cutting back on the water- aka- not drowning the pods.

I know it's hard to start feeling 60- 70 degree temperatures and not want to immediately start planting. I get it. It's hard to be patient after several cold months of winter. I'm finding it better to plant later rather than early though. Planting early risks another freeze and attracting pests when the plants are still too young to defend themselves.

If you really need to see some growth though- just keep a eye out for early signs of spring. Several daffodils are already in full bloom...
Found this lovely surprise Friday!
And if you look close enough while pruning, you may be astonished to see your plants already at work...
Those little red buds are the start of this year's echinacea!
You may even find a friend or two!
Well hello there, lil' lady!
Don't worry friends, full-out spring will be here soon enough.

Sunday, October 6, 2013

The Great Pumpkin: Pumpkin Puree

It's finally here! It's that time of year where you can smell apples in the air. Where you can wear a light jacket outside. Where you can reap the harvest of your garden. This, my friends, is autumn!
Even got out the fall decorations
I cannot express how much I adore this season. It's just so pleasant to every sense of the body: feeling warm sun with a brisk wind, seeing vibrant mums and gourds, hearing crunching leaves, smelling rich spices, and let's not forget taste. Oh, the delectable recipes that come out this time of year!

A large staple in all of these recipes is my favorite gourd in the world: the great pumpkin. This is the third time around now where I plan to convince everyone to add some pumpkin to their lives. I love pumpkin so much that we actually attempted our first pumpkin patch this year! I'm happy to report it was a great success! Who knew three little seeds would go so far.

In case you are a new reader, you can catch up on how your body can benefit from some pumpkin. You can also stop by my pinterest recipe page to check out some nifty pumpkin recipes. The base of most of these recipes is pumpkin puree; which you can easily find your grocery store. One interesting fact is that central Illinois is home of a large Libby's pumpkin cannery. Visiting the Pumpkin Festival in Morton, Illinois, was one of of fall traditions before we moved to Kentucky.

You can easily make your own pumpkin puree though at home. All you need is to pick up some adorable pie pumpkins!
Pie pumpkins from Wurth Farms
Now pie pumpkins are not your average jack o' lantern gourd. They are a bit smaller, but have less seeds and a thicker flesh. They also have a nice sweetness to them. All of these factors make it perfect in the kitchen. It just takes a little bit of work. First you need to preheat your oven to 400 degrees. Then you should line a baking sheet with tin foil and dab on a little bit of olive oil.

While the oven is heating up, slice the pumpkins in half before digging out the seeds.
Feel free to save & roast the seeds with this recipe
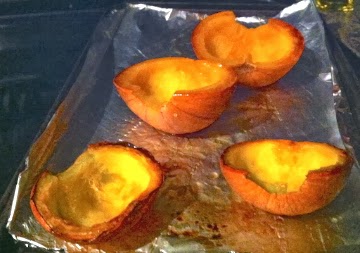
Then place them cut side down on a baking sheet & cook for 45 to 50 minutes. Take out & allow to cool.
Roasted pumpkin: yum!
After it is cool enough to hold, use a spoon to scoop out the roasted flesh. Place in a blender.
Cooking the pumpkin makes this step a lot easier
Simply puree the pumpkin and place in a jar. You cannot can pureed pumpkin but you can freeze it!
Can I just say I LOVE Ball's freeze jars?!
There you have it: pumpkin puree! You can use this for any of your pumpkin recipes whether it's pumpkin french toast paired with a pumpkin latte, pumpkin chowder, pumpkin pecan pie, or even something special for your pets or a pumpkin scrub to spoil your skin. There are tons of ways to use and enjoy this special gourd.

Monday, July 8, 2013

A True Disney Kid

I'll admit it. I'm a Disney kid. I adore 99% of Disney's original movies. That includes most Pixar movies, especially "Ratatouille."
NOT THE PARSLEY! Courtesy of Born For Geekdom
I could possibly blame Remy and his love of cooking for my recent obsession with recipes and French culture. This lil' rodent is an inspiration for anyone to get into the kitchen and try making dinner from scratch. The movie also introduces a younger American generation to a society that prefers flavor and freshness over convenience.

I could give a full critique on this movie. Pixar does an amazing job at adding social commentary to their family films. But that's for another day. The point is "Ratatouille" is a great movie that I now want to watch instead of sharing my attempt at the title recipe. I will manage though. For your sake. You're welcome.

This weekend I decided that we are far enough into summer to make my first attempt at ratatouille. Our farmers' market has gotten busier, and I now have an awesome mandolin...

and my Mother came down to visit us for the Fourth of July!

How many more reasons does a woman need?
I had to show off at least one awesome firework photo
The best thing about our ratatouille is that the dish itself was made entirely of local produce- even some from my garden! And while the process was grueling, it was totally worth it! Unlike the movie, ratatouille is typically a stew dish. That movie version is so tempting to try though and several chefs posted their recipes including this one form Smitten Kitchen. Here's how my attempt went:
Well, this is before I baked the dish. You get the point though.
I did want to share a few tweaks to the recipe. First off, I made my own tomato puree. That included the my least favorite thing in the world... blanching, skinning, and gutting tomatoes. Oh how I despise this process. So, I made a collage!
Check this out if you want to read further about blanching, skinning, and gutting tomatoes.
With all that being said, it was worth it. I was stuck with a good amount of ripe tomatoes but there was not enough to can. Not only did I make enough for this recipe, but I also have 3 more cups to throw in pasta sauce or even another ratatouille dish!

A few other (but smaller) tweeks I made include using a skinny, but long bell pepper and mincing the garlic. And as you can see I used a 10" rectangular pan instead of an oval. None of these are big changes, but those are my suggestions if you try this recipe. I also recommend tossing a dollop of sour cream!

This dish took me about two hours to make. Most of that though was probably the tomato puree and the time in the oven. It was also well worth in! I paired it with cream-cheese-stuffed sweet mini bell peppers and couscous. This dish turned out so well that all of us went for seconds! It's also vegetarian based and chocked full of nutrients. You can bet this will recipe will be made more often!


Monday, May 13, 2013

Guest Entry: Building Easy Garden Beds


Contained within this blog are instructions for installing in-ground garden beds, written by Lawson, Manda’s hubby.  Nice to meet you.

There are two main advantages to in-ground beds.  They are more cost-efficient than raised beds, and allow for greater freedom of total area.  While raised beds usually come as store bought kits, they are often expensive.  Additionally, the dimensions for these beds are pre-determined, which restricts the scope of one’s gardening endeavors.  So, for larger-scale gardening applications, in-ground beds are the better choice.
[You may remember our garden last year]
Soil quality is always a consideration for in-ground beds.  Usually, darker the soils are more fertile.  Also, the type of soil must be considered.  Clay soils impede upon root growth, whereas sandy soils lack nutrients and dry out quickly.  These problems can be remediated with store-bought topsoil or compost, depending on the needs of individual soil profiles.  When in doubt, ask a county extension agent.  They even offer soil samples to help determine each bed’s individual needs.

Again, cost effectiveness is an advantage.  The tools necessary are common and cheap, if one is willing to put forth the work.  Of course, gas-powered yard machines do lighten the workload.   The beds for this blog were installed with these tools:

Shovel
Straight tooth rake
Wheelbarrow
Gas-powered Tiller
Garden Hoe (if no tiller is used)
Stakes (or other markers)


Planning is important.  Select a site for the bed, considering soil quality, hours of sunlight (full sun is most desired), and aesthetic value.  Then stake out the corners of where the garden bed is desired.

Begin digging around the perimeter of the bed, loosening the sod (grassy root system).  Once the entire perimeter has been loosened, start digging up the sod.  The grass roots may go as deep as six inches, so care must be taken to ensure the root system is completely removed.  It helps to shake off the soil from the sod, both to conserve precious topsoil and to reduce the weight of the sod (It’s heavy!).  The sod is also a valuable resource, so use the wheelbarrow to transport the grass roots to wherever fill is needed.

Some with powered tillers are inclined to just till the grass into the soil.  This should be avoided, because the tiller can actually serve to bury the grass roots further, only adding to the difficulty of removing the root system from the soil.

With the sod is removed, the general area of the garden can now be seen.  With either the powered tiller, or a standard garden hoe, begin loosening the soil.  Any roots from nearby trees should be removed with a shovel or perhaps a hatchet.  Usually the tree is older and strong enough to withstand the loss of these outer roots.  Once the soil is tilled, the border is ready to be installed.

The beds for this blog were bordered with 2x6 lumber.  They were built separately then placed on the bed.  If done in this fashion, care must be taken to dig out around the border to ensure a snug in-ground fit.  Paver stones are also a sturdier (yet more expensive) option.  With the border installed, any additional topsoil can then be added and mixed with the straight-tooth rake.

As it can be seen, the most demanding step in this process is the removal of the sod.  This is also the most crucial step.  Grass is a very invasive plant, and can easily out-compete any vegetable root.  As with any project, work initially invested will lead to less work later.

Easy planting and good harvests to you.

Monday, April 29, 2013

Let's Just Keep Chemicals Out of This

No, you don't need herbicide for your garden. Or pesticides. We see so many advertisements these days for chemicals that "help make the most" out our your garden but that leads to who-knows-what on your harvest. Outside of very rare situations, all you really need for a successful garden is healthy plants.
My sage is about to bloom!
Healthy plants fight off their own diseases and pest. It's simply allowing nature to be nature! And it's not that hard to provide your plants the tools they need to stand their ground. First, they need good soil. I'll admit I don't get into soil acidity, but it's easy to simply keep your soil full of nutrients. That's through nutrient-rich compost and rotating your plants. Planting the same annuals in the same spot every year will leave your soil useless overtime. But giving mother earth tasty compost and switching out plants that leave what the next plant needs creates the groundwork for a healthy garden.

Then there is my favorite tool: companion planting! It's kind of like the tick bird and the rhino. It turns out certain plants work really well together and keep nasty pest and disease at bay. One flower I heavily rely on in my garden: marigolds.
As previously mentioned, I planted A LOT of dwarf french marigold this year. And a few Inca marigolds. I'll also buy a few more after we finish off the third bed.
There's a lot of mixed results out there however on whether marigolds live up to their name. Several small-time garden bloggers praise marigolds at keeping bugs and animals away from the garden with their strong fragrance. Others aren't so generous, like the Alabama Cooperative Extension System writing "little documentation exists showing marigolds actually repel insects. In fact, they may attract harmful pests damaging not only the marigolds but also your vegetables."

Later on the provided link above does note that dwarf french marigolds appear to be the most consistent at keeping soil-dwelling nematodes away. Nematodes are microscopic parasite that looks like a miniature worm. Depending on the species, it can do a decent amount of damage to some plants like tomatoes and strawberries.

I keep finding myself going back to the several garden bloggers who swear by marigolds. And they are beautiful. So what's the harm in creating a colorful marigold fort around my cherished plants. It appears to have worked for us before.
Some marigolds keeping guard for my squash and zucchini
Marigold isn't the only flower you can consider to deter pest. In my research for marigolds, I suddenly came upon pages and pages about a beautiful flower called nasturtiums. It apparently keeps away squash beetles, whiteflies, and striped pumpkin beetles. With our beloved squash and future pumpkins, we will have to give it a try.

Some gardeners also swear by certain mints (warning: it's very invasive!) , catnip, and various kitchen herbs to prevent certain bugs. Just mindful planting of your produce plants can improve your harvest too. This simply just takes some research into what you want to grow. Here's a Companion Planting Guide by seed company Burpee.

Oh and before I forget, I decided I will occasionally provide a link to a recipe I discovered on Pinterest. The kicker is that it will be based on what's in season. May is just around the corner so I just finished up a batch of Strawberry Crunch Bars! It's a shame it's only seasonal a few weeks year in my area. But it's worth the wait!
Last year's Strawberry Crunch Bars!

If you ever want to check my attempts at Pinterest recipes and crafts, be sure to follow this board!

Monday, April 22, 2013

Gardening In Stages

So despite my allergy attack last week, I still braved the outdoors to get another round of gardening done. It's been a rough week for everyone, including in our news department. Nothing gets you in a better mood though than getting outside and muddy! Before I lay out what we've planted so far, I have to give my husband some major kudos. He recently did some major yard work to prepare our garden. First he did the typical mowing & weed-whacking. Then some simple landscaping to protect some of our plants that are in the yard.
Would you believe this is from my tiny echinacea from last year?!
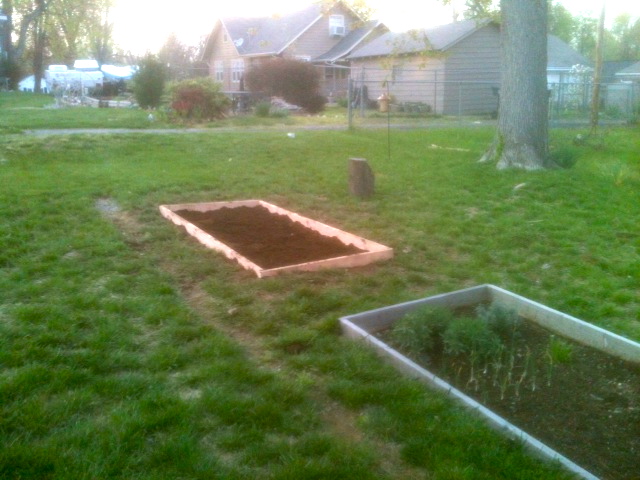
We still had our two garden beds from last year. Thankfully the hubs did such an awesome job at tilling that we really didn't need to weed the area at all! We decided though to put in one more garden bed. Several of our crops (especially squash and zucchini) need to be rotated every year. Rotating crops helps your soil recover from all the nutrients that were once removed. A three year rotation works best for us so my husband tilled up and installed a third bed. Doesn't it look great?!
With that being said we stopped by a local nursery this weekend and picked out some of their early plants. There's still a few more I'd like to find. We have a whole garden bed that's blank! But we got a head start on some of our garden this weekend.
Our brand new garden bed as we figure out what goes where
Now I have to give Schmidt's Farm in Paducah, KY a decent shout out. We were able to get all of this for roughly $33:
- (3) Zucchini
- (3) Straight-neck summer squash
- (4) Jet Star Tomatoes
- (4) Jalapeno Peppers
- (4) California Wonder Bell Peppers
- (4) Garlic
- (1) Oregano
- Lots and lots of french dwarf marigolds and a few Inca marigolds
- Two small pots

 We were able to get everything in the ground Saturday. To keep my histamines at bay, I took up some more benadryl and tried something new: wearing goggles. I'm sure the whole neighborhood thinks I'm crazy. But hey, my eyes didn't end up burning like five thousand suns afterwards. So maybe it pays off to look like a science-kid.
Hubs was nice enough to take this unexpected photo
Over the next few weeks I'll share a few tricks of the trade to simple gardening. We will also have a few additions this year including (but not limited to) green beans, strawberries, and best of all: pie pumpkin! Feel free to share what you're growing this year along with any questions you have.

Monday, April 15, 2013

Don't Be A Literary Snob

My life is genuinely ironic during this time of year. Or at least what most people consider to be ironic, according to my husband. But if our great American society has taught us anything is that the majority rules, right? So what I'm about to explain is a perfect example of irony.

During the last few years I've developed a true love of nature. There's so many ways to enjoy being in tune with Mother Earth: hiking, camping, boating, scuba diving, even going on a safari! My real passion though is gardening. It's even sweeter that I've developed a small knack for it.
Saving my calendula last year
But there's one thing keeping me from really enjoying the start of this year's garden. And there's no amount of admiration of the outdoors that could change it. If you've been an avid reader than you know this is the time of year that I deal with my allergies. I'm allergic to various kinds of pollen, but it's really tree pollen that gets me. I'm lucky enough to only need medication for about 3 months out of the year, but I tell ya, April is normally the most miserable time of my life. And it's every year. We've been lucky to have a cold spring this year and I've been pushing the limit of how much I can be outside before walling myself indoors for a few weeks. But alas spring is in full bloom. I learned that the hard way this weekend.

Don't get me wrong, it was totally worth it! In fact, let me share how much fun I had playing in the dirt the past couple of days, eh? First off, as a belated birthday present, my husband bought me a a bundle of strawberry plants! It's the first time we're trying it out, so lets hope for a sweet success this year!
Isn't it cute?! Hopefully they will enjoy their new home.
Potting the strawberries was a good warm up for Saturday afternoon. I caught wind of a local church working with our city's park department and local school to set up a community garden that will be an after school project for students! Not only is this a safe program for kids during the summer, but hopefully they will learn the value of what they grow. Who knows, a lot of big wigs out there say a child will more likely eat a vegetable they assisted in growing. And if their harvest is plentiful, some of the produce will go to a agencies that help feed those in need. With all that being said, who wouldn't want to help out?!
We went out and planted some cabbage and broccoli
The rows may not be straight, but these kids were great. They just loved digging! They should be getting a few more plants too. If not, there's plenty of seeds to start. As an extra bonus, I actually won a door prize for a free plot in the community garden these kids weren't using. Since I already have more than enough space in my own yard, I gave it to a woman who was interested in starting her first garden. Here's hoping she gets good "pay it forward" beans out of that.

By Saturday afternoon I had already taken a few additional anti-histamines in hopes of keeping my immune system from going crazy. I felt good and decided to do more garden work which included attempting new seeds & potting some seedlings I bought a long with the strawberries. That included some stevia. I'm so excited to try out a sugar substance that's not processed! I also apparently found out what a purple shamrock root looks like...
Have to admit... it's not what I expected...

By the time I called it a day it felt like my eyelids were covered with sand paper. Thankfully my medications plus some benadryl kept everything else at bay. Runny nose? Hives? Ain't nobody got time for that. I really don't have time for my eyes to burn and entire face to feel like there's layers of pollen on it either but I'll take what I can. Apparently I felt good enough to do it all over again on Sunday. Stayed outside to replant my calendula (which survived the winter, wha?!) with some new seedlings. I was also able to set up my porch in green fashion.

With all that being said, I feel great... and awful at the same time. You know that feeling when you get something caught in your eye and you can get it out? Or when you wake up in the middle of the night and suddenly have to turn the lights on? Well mix those two and multiply that by 15 million times. It also makes me slightly exaggerate. But really, my eyes are so sore that the rest of my face is tender. I also developed a small rash on my hands. So I'm increasing the benadryl. And in case you didn't know, that stuff knocks. you. out.

But I'm not here for a pity party. Far from it. I love what I did this weekend, even if that meant playing it low for the next few days. Knowing that I got this far with my garden before imprisoning myself in my own home makes me really happy. Hopefully I'll be back at in a few weeks.

So a gardener with awful allergies to pollen. I don't care what you say, I think it's ironic.

Monday, April 1, 2013

Happy Little Home

Wow, has it already been a year?! Yep, it was a year ago that Lawson & I bought our first house. A quaint little bungalow on a quiet street in Western Kentucky. I'm amazed at how quickly the year has flown by for us.
This may look familiar...
When any milestone like this comes along, I like to take the time to reflect on what we've able to accomplish and what still needs work. Let's take a look at what we've gotten done within the first year of buying a home.

First- We got straight to work on our new lawn and garden!

That included moving around some calendulas
Let's not forget the rush to move. We gave ourselves a month to move out of our rental home. It did test our patience and our wallet, but I'm so glad we took the time to get it all done correctly.
It took us an entire month, but we were able to leave it better then when we first walked in
We picked up a new sofa & love seat and did some minor work to make it our home. Before we knew it, it was time for our house warming party!
That turned into a very long party, let me tell you!
We fought off a tough drought last summer and enjoyed the fruit of our labor in the garden. I introduced you to some delicious recipes and why you should think about what you eat.
Yummy backyard bell pepper!
The entire summer flew by and we realized we really needed to get to work on our little abode. We began (and have yet to finish) our first main project: replacing the duct work.
The duct behind me was what we first replaced.
Christmas quickly followed and we turned our home into a Winter Wonderland! It was also the first year we hosted Christmas for our family.
And sure enough we're already at Spring of 2013. There was one last thing we were able to do before this weekend. We replaced the windows in our basement and let me tell you, it needed it! The glass was old and feeble. The sill was practically decaying. We realized new windows would help keep us safe during severe weather along with keeping out any intruder. The old windows were also the main reason we had bugs & spiders getting into our basement. But it now all sealed & fresh. We are so happy with the results!
I bring you the nasty before and the beautiful after
So, we've accomplished a few things, but there is so much more work to be done! Hopefully we can finish of the duct work this year. We also plan to replace the toilet in a couple weeks. There will soon be the day that we tackle the biggest project of all: the roof and attic. 

There will most likely not be a new post next week. We will be busy on the road and celebrating my 26th birthday! I want to thank each and every one of you that's stayed with me at Limelight Musings. It's turned into much more than I could of ever dreamed of. But it's not over yet! There's many more recipes, crafts, home improvement projects, and rants ahead!
One of our first photos at the house. Couldn't be happier!

Tuesday, March 19, 2013

The Start of Garden 2013

I can't believe I'm saying this, but I do miss parts of Spring. I mostly miss baking with local seasonal fruit. I yearn to pick buckets of strawberries & bake crunch bars. Speaking with local farmers about their harvests. Cooking breakfast with eggs from my friend's hen house! All of it!

Thankfully I don't have to wait much longer. This weekend I was able to start the process of getting this year's garden ready! We now have a few seeds on our hands.

If you're wondering why it looks like the seeds are wrapped in newspaper is because they are. Once these little guys are ready, I should be able to plot them into the ground with their biodegradable newspaper pot! I found the idea from this website. The instructions are super easy to follow. I didn't even need to use masking tape. They held together well enough with water & weight. It's now sitting in a warm, sunny spot in our attic.

So what are we growing this year? Well, I started some spinach, bell peppers, echinacea, lavender, sunflowers, Japanese irises, baby blue eyes, and columbine. 

Aren't they cute?!
I was able to plant a few more seeds outside of these little guys. We also have some basil and calendula in a few pots. I also brought out the pots that still contain last year's mint, chamomile & oregano so here's hoping those grow back. I found out today (of course) that we are actually expecting some snow later this week. I'm hoping the seeds are young enough to be protected in the ground. If not, I'll get to try all over again. At least it's a good weekend therapy! Have you started your garden yet?

Monday, January 21, 2013

Worm Food That Doesn't Involve Dead Bodies

We received the perfect gift this Christmas: a compost bin! And I don't mean that sarcastically. In fact, we asked for a compost bin! We've waited awhile to get it up and running since it's still winter but got too excited. This weekend had such nice, sunny weather that we got a little antsy to get the new bin up and running... and replace our nasty -yet thrifty- compost silo.
Yummy. You can see pumpkin from October.
Thankfully it didn't take too long. My husband moved the old compost-filled silo into a wheelbarrow. We then placed the new compost bin in the silo's place (no assembly required = extra bonus). Then we simply took turns to dish the old compost into the new bin.
You see only him, but I swear we took turns.
Surprisingly, our compost filled up most of the bin. It won't stay that way for too long though. The compost bin is more efficient than the compost silo. We are supposed to turn it three times a week to get compost within just 6 weeks. During that time it will shrink in size.
Looks as if it's always been there.
I began to see parts of our future gardening compost during my turns to shovel. Sure it was in between some moldy grass here some mushy tomato there; but it just made me so excited for the upcoming spring! I'm going to despise most of it thanks to my allergies, but I really can't wait to begin our garden. There will be more veggies, more flowers, more herbs... it's going to be beautiful!

Until then, my excitement will go into what else I can add to the compost. I mean the possibilities are endless since we now have a closed, rotating bin. Here's just a few things that we will add to our previous plant-based compost:
- Coffee Grinds (thanks to our new EkoBrew for the Keurig)
- Vegetable Leftovers (outside of bad veggies from the garden)
- Fruit Leftovers
- Shredded Paper
- Torn-up Cardboard
- Eggshells
- Hair from hair brushes (worth a try, just need to scatter it apparently)
- Pet Hair
- Dryer Lint
- Corn Stalks & Cobs

The main goal is to have a good amount of nitrogen and carbon. Oh, and did I mention worms? Thankfully, my husband was able to find a few compost-lovin' guys in the yard and tossed them into the bin. Another thing that makes this bin so awesome is that there's a way to collect what's called compost tea. By spraying this on your plants, you can help them fight off disease. Just another reason to love the awesome power of decomposition.

It's just like what Ms. Frizzle said: "it doesn't have to be delicious to be nutritious." And if you have no idea what I'm talking about then you need to read this to your children. Happy Rotting!