Showing posts with label Products. Show all posts

Monday, January 21, 2013

Worm Food That Doesn't Involve Dead Bodies

We received the perfect gift this Christmas: a compost bin! And I don't mean that sarcastically. In fact, we asked for a compost bin! We've waited awhile to get it up and running since it's still winter but got too excited. This weekend had such nice, sunny weather that we got a little antsy to get the new bin up and running... and replace our nasty -yet thrifty- compost silo.
Yummy. You can see pumpkin from October.
Thankfully it didn't take too long. My husband moved the old compost-filled silo into a wheelbarrow. We then placed the new compost bin in the silo's place (no assembly required = extra bonus). Then we simply took turns to dish the old compost into the new bin.
You see only him, but I swear we took turns.
Surprisingly, our compost filled up most of the bin. It won't stay that way for too long though. The compost bin is more efficient than the compost silo. We are supposed to turn it three times a week to get compost within just 6 weeks. During that time it will shrink in size.
Looks as if it's always been there.
I began to see parts of our future gardening compost during my turns to shovel. Sure it was in between some moldy grass here some mushy tomato there; but it just made me so excited for the upcoming spring! I'm going to despise most of it thanks to my allergies, but I really can't wait to begin our garden. There will be more veggies, more flowers, more herbs... it's going to be beautiful!

Until then, my excitement will go into what else I can add to the compost. I mean the possibilities are endless since we now have a closed, rotating bin. Here's just a few things that we will add to our previous plant-based compost:
- Coffee Grinds (thanks to our new EkoBrew for the Keurig)
- Vegetable Leftovers (outside of bad veggies from the garden)
- Fruit Leftovers
- Shredded Paper
- Torn-up Cardboard
- Eggshells
- Hair from hair brushes (worth a try, just need to scatter it apparently)
- Pet Hair
- Dryer Lint
- Corn Stalks & Cobs

The main goal is to have a good amount of nitrogen and carbon. Oh, and did I mention worms? Thankfully, my husband was able to find a few compost-lovin' guys in the yard and tossed them into the bin. Another thing that makes this bin so awesome is that there's a way to collect what's called compost tea. By spraying this on your plants, you can help them fight off disease. Just another reason to love the awesome power of decomposition.

It's just like what Ms. Frizzle said: "it doesn't have to be delicious to be nutritious." And if you have no idea what I'm talking about then you need to read this to your children. Happy Rotting!

Monday, January 7, 2013

DIY Gift: Lip Balm & Why My Husband Refuses To Wash Dishes From Now On

It maybe after the Holidays, but I still wanted to provide ways that you can create great gifts for a loved one. Maybe save the idea for next year or use it as a way to get brownie points for Valentine's Day or St. Patrick's Day. You never need an excuse to give a small gift that you made.

One new idea we tried this year was DIY herbal lip balm. I've been enamored with Rose Mountain Herbs for quite some time now. Not only do they sell great, healthy products but they also provide a blog and YouTube Channel that inspires your inner herbalist. Have I said enough good things about this company yet? Are you still reading this? Hope so.

Well, their YouTube channel has a great tutorial on how to make lip balm. It seemed so simple we thought we would try it out.


First off, you will need:
1/2 C Calendula Oil
1 oz Bees Wax
1/2 teaspoon lavender oil
20+ lip balm tubes (we did have left over lip balm)


It was so fun trying out this recipe! But I highly suggest you use specific cookware just for wax products. We'll get to that later. But basically you start off with melting the one ounce of wax. I did this by cutting off an ounce, shaving it, then place in a double boiler. Shavings will melt quicker than just a block. While it's melting, go ahead and take the caps of of the lip balm tubes or tins.

After the wax is completely melted into a liquid, you pour in the cup of calendula oil. Next step: don't freak out when the wax slightly solidifies like this:

The wax slightly solidified because the oil was room temperature. So just keep the heat up so the wax can melt back down to a full liquid. This is also when you add the 1/2 teaspoon of lavender oil. You can actually use a 1/2 teaspoon of any kind of essential oil for flavoring. I might use mint oil next time.

After everything is all smooth & mixed, you then have a very short amount of time to pour the balm into the tubes. To make it easier for us, we poured the balm into a measuring cup with a spout. Then poured it into each tube and let it dry.
The only issue I had was that it appears the wax dried before it could get to the very bottom of the tube. It didn't take too long for the entire tube to dry. We labeled and presto! 20 lip balm tubes to go out as stocking stuffers!

Now for the downside. Due to this little experiment we had a double boiler pan, spoon, and measuring cup that were seriously coated in wax and oil. I did my best with hot water to wash it out before my husband came home, but I wasn't able to get it all. He wasn't impressed. Needless to say you should try to to all this with older kitchen equipment or purchase cheap tools that can be dedicated just to wax projects.

Everyone that received lip balm for Christmas love it. And we were able to make it with local beeswax purchased at the Farmer's Market along with lavender oil I made with lavender branches my in-laws gave to me. Next year I hope to have enough dried calendula to make my own calendula oil too! What other essential oils do you think I should add for flavor?

Monday, December 3, 2012

DIY Festivus: Mantle Sign

So it's finally December. Can you smell it in the air? Christmas lights are up, everyone is rushing to the mall, and coffee stores are featuring holiday-themed flavors. It's Festivus!
Some of the delicious brews at our favorite coffee shop
As you can guess from my lack of posts, we've been busy. Outside of our normal duties, we're also busy decorating our home in a full holiday fashion. This is the first time we get to decorate our new home for Festivus. I'm so excited!

But I  also wanted to share one decoration I made this year that literally cost just $4 and 20 minutes for me to make.

So here's what you need:
4 Frames (bought at the Dollar Store)
Holiday-themed background (I used scrap booking paper I had from a 2011 project)
A Pencil
A Permanent Marker

It doesn't get much simpler my friends. Cut the background paper the proper size to fit in the frame. Then I drew the letters with a pencil at first followed by the permanent marker. Added some lines where needed. You can use paint, but I feel the marker is easier to control. And it practically dries instantly.
Not my most flattering photo but you get the point.
If you are not comfortable enough to do this free hand, you have a few options. There are a lot of stencils out there for the letters. And a ruler can be easily applied to sketch guidelines so it all matches.

For years I've been trying to find a good way to draw a snowflake. And if you are in the same dilemia & would like to know how I drew mine, here's a quick step by step tutorial. The design is open enough to make imperfections lovely.

After you draw out what you like & it dries, it's ready to go back into the frame then be placed in the desirable spot. For our mantel, I did intentionally pick one "odd" frame and overlapped the frames to give a 3D effect.
So there you have it! A quick, easy, and cheap way to add a new decoration to your home this season. I hope to share a few more ideas throughout the month when it comes to either decorations or gifts. I'm also pleased to share a photo of this year's Christmas tree! Are all your decorations up yet?
Happy Festivus!

Wednesday, October 31, 2012

When Illness Strikes

So I'm a little behind this week. But it's because I caught a nasty head cold from work. Thankfully I've had the past two days off so I was able to relax with some buddies.
What I woke up to Monday
Everyone seems to have their cure for the common cold, but I thought I would share what I'm doing to get over this ailment quickly.

First off you need some ibuprofen & vitamin C. Ibuprofen takes down any swelling or inflammation, including your ear tubes & sinus cavities. I also grabbed a six pack of orange juice cartons. Vitamin C can also help reduce inflammation and is well known for boosting your immune system. Some say while it won't cure a cold, it can help prevent further complications. Outside of juice, drinking tea is also key.

The one echinacea flower I was able to grow this year
I normally try to drink echinacea tea. Echinacea is an amazing herb along with a beautiful flower. It is actually a native plant in North America.

Echinacea's root is normally what is used, which is best after growing for three years.  Some argue the real benefits of echinacea for the flu or cold, but it does have anti-bacterial properties that can stop pathogens from spreading. It can also be used as an anti-inflammatory.


But alas, I was out of echinacea. And my normal grocery store was not selling it. And needless to say with a cold, I wasn't motivated to look elsewhere. But there's more you can take than echinacea!

I first started off with some peppermint tea. Peppermint is normally best for an upset stomach, but mint's powerful menthol does wonders as a decongestant. It's also known as an astringent, antiseptic, antibacterial, and antimicrobial- just to name a few. My mother swears by peppermint tea for a sore throat and she's right. As with about any tea, I add a bit of honey. It not only sweetens the tea, but honey is also beneficial to your throat. If you don't enjoy peppermint tea, you can also brew and steep the tea before just inhaling the vapors.

Over the past couple days, I interchanged juice with peppermint tea along with Celestial's sleepytime throat tamer. That contains chamomile, licorice, ginger, tilia estrella, and slippery elm to coat the throat. Continuing a lot of a fluids is a must when you are ill so the body can stay hydrated as it disposes the bacteria & toxins. And knowing that I'm normally dehydrated, the extra fluids can't hurt.

But along with fluids, vitamins & herbs, I must confess that I used some medications. I'm dealing with a head cold- there's nothing wrong from the next down. There's just a sore throat and a lot of head congestion. So I caved in and took either some form of NyQuil or Mucinix. But we can still go over what these medications do to the body.

First we have DayQuil, which is obviously a "day" version of NyQuil. It has acetaminophen, phenylephrine, and dextromethorphan as active ingredients. I would rather see ibuprofen than acetaminophen since acetaminophen reduces inflammation in different way than non-steroidal anti-inflammatory drugs (like ibuprofen & aspirin). And Tylenol never really does anything for me.

But it's the Phenylephrine that matters the most to me. It's a decongestant and is marketed as a replacement for pseudoephedrine. Decongestants retract blood vessels in the chest and nasal cavities which reduces inflammation and mucus in those areas. Peppermint tea can break congestion up, but I needed my body to stop making unnecessary mucus.

Dextromethorphan is a cough suppressant, but my cough in this case isn't terrible. That ingredient is just a bonus.

Ok, a friend convinced me to also take some Mucinex D. Its active ingredients are guaifenesin and pseudoephedrine. Guaifenesin is a cough suppressant like dextomethorphan. Both are debateable as a "good" cough suppressant, especially for kids. I would say if you are looking for a good cough suppressant, stick with honey and tea.

Mucinex D or even NyQuil D's biggest selling point is that it has pseudoephedrine, which is the leading cause of a big debate in my state. Pseudoephedrine is not only a degonestant, but a powerful stimulant. Drug makers use pseudoephedrine to make meth. In response, lawmakers in several states are making restriction of how a person can get medications with pseudoephedrine. So most drug companies conjure up a replacement for pseudoephedrine & can be sold over the counter. I'm not too concerned on this topic, but I can understand the arguments.

So there you have it- what I used to battle an icky head cold. It's been about two days & I'm feeling a lot better but it's also thanks to one thing I haven't mentioned yet: rest. I filled in at work over the weekend & in return I had Monday & Tuesday off. While it's always awful to be sick over your weekend, I'm overall glad. It happened over a time period where I could get a lot of rest. Sleep is the number on best way to get rid of an ailment. Resting allows your body focus entirely on destroying the bacteria or virus. And who doesn't enjoy a lazy morning or two?

Also something to keep in mind: a good amount of sleep, vitamin C, and tea will help keep away the cold or flu. So rest well my friends; and enjoy a cup o' tea for me.
Katsumi ensuring that I keep resting

Monday, October 15, 2012

Knowing Where Your Food Comes From

Taking a quick break from pumpkins to give an example of why I love living & eating in Western Kentucky.

This weekend, we went with another couple to Palmer Farms, which provides local, grass-fed beef. This is where we've been getting our more nutritional beef that takes a chunk out of our carbon footprint while tasting absolutely delicious. You can read more of why I'm getting picky about my beef here.

So, this was my second time going out to the Palmer Farm. It's about an hour and a half round trip drive for us to pick up about $50 (normally) worth of meat. And the ground beef is $4.50 / pound. And I can tell you without any hesitation that every cent, tank of gas, and minute of my time is worth it.

Both times we've been to the farm, it's been a wonderful experience. And this last time was no exception. We were first greeted by Stacie and two handsome lads who couldn't wait to show us some of their calves! We were able to spend some quality time with two calves that were just a week old and needed to be bottle fed. They were precious!

Couldn't get too many still photos of this guy- he was frolicking all over!
It took awhile to get this sleepy girl up, but isn't she a beaut?
In the midst of hanging out with these calves, Stacie's husband Mike showed up. We all ended up having a lovely symposium on the drought, livestock, and how a cow's diet impacts the flavor of meat. Then general crops came up in conversation and they offered to show us their tobacco barns. And oh my, did it smell wonderful.

Just one of the Palmers' barns that are full of tobacco leaves
During that time, we were able to not only learn about a crop that assisted in making our great nation, but also about American farming in general. On my first note, it was just a few tobacco seeds that John Rolfe was able to smuggle to the new land that gave a jump start to the colonies. You can just tuck that random fact away for a rainy day.

But we were also discussing what all has to be done in order to get the crops (like tobacco) to harvest in time. And I guess it just never crossed our mind for my husband to apply for seasonal farm work. I say this because the hubster is in the process of starting a career in (what he hopes) biology. Farm work, along with finishing school, could definitely get him one step closer! And of course, we all hope we can work something out next season.

I'm sharing all of this to tell you that I'm so happy to have these conversations with the family that raises my delicious burgers and steaks. We are able to talk about what grass the cow eats and what all they have to do when a calf gets sick. When it gets a bit dryer (can't believe I'm saying that after this devastating drought), we will even get to tour the pastures! And we hope this is only the beginning. There's a couple of other farmers when it comes to different livestock and crops. There's even one Amish farmer out here that wants to do a pig roast with his customers. These are relationships that are lost for most Americans. 

I got around to a few other things this weekend- mostly cleaning, cooking, and strangely: gardening! With the rain and still semi-warm temperatures, the tomatoes are still producing and my chamomile even seeded into a flower bed. So that's now a potted plant we will figure out how to house during winter. Maybe I'll get more tea out of it!

Live in Western Kentucky and love the thought of knowing your farmer & getting delicious grass-fed beef? Check out the Palmer Farms website. Not only can you learn more about the health benefits of grass fed beef, but Stacie has their prices along with some recipes on there.

Palmer Farms

Monday, September 17, 2012

Oat Flour Waffles & Real Maple Syrup

Hello again friends. Bet you didn't expect to see a new post this week, eh? I don't blame you. But things are really starting to calm down. One thing is for certain, a wonderful (and grueling) fundraiser for the American Cancer Society is over. Our Ladies Social turned out great.
Dressing in style at the Ladies Social
But with that over, I was able to get another relaxing chore day at home with my husband this weekend. And we started the day right by sleeping in before I made us waffles. But these aren't your everyday kind of waffle. I made the mixture myself and with oat flour verses all purpose.
Waffles = Om nom nom
So why oat flour you ask? Well, in our attempt of getting to a more natural/traditional/hopefully healthier diet, I'm trying to replace nasty uber-processed ingredients with items in mother nature's pantry. Normally it's as easy as using olive oil instead of canola. But processed sugar and flour appear to be awful on the body since those lack any kind of nutrient. So those two are on the top of my list of figuring out replacements.

Nutrient-speaking, oat flour is a great substitute for all purpose flour. Oat flour contains more protein, dietary fiber and calcium. Also (depending on if it's from gluten-free oats) the flour can be gluten free. Oats in general are a great way to help your heart and reduce your cholesterol, so it seemed logical to try to implement more into my baking. And I have a lot on hand since I use it for our dog biscuits. Also, if you have a food processor- you can make your own flour.
This is not homemade, but here's an idea of it's consistency
BUT I have to warn you that oat flour is not the exact same as all purpose flour. Since I've incorporated it (and Amish butter) into my cooking, I've noticed a distinct consistency difference- mostly for the better. But the waffles (and other baked goods) are more moist and dense. It's still delicious, but keep that in mind when you try to replace your own baking ingredients.

So Sunday morning, I decided to attempt this waffle recipe, but changed a few things. So here's what I did:
- 1 1/3 c Oat Flour
- 4 t baking powder
- A pinch of salt
- 3 t sugar
- 2 t cinnamon
- 2 eggs, separated
- 1/2 c butter, melted
- 1 3/4 c 2% milk
I pretty much did everything that recipe called for, just added my own flare and ensured at least one meal that day didn't contain processed flour. It turned out great. The only thing I would note is that I had to put my waffle iron on a lower heat and baked longer. That's because the oat flour is so thick, it took awhile to cook all the way through. But after a few lame attempts, our last two turned out perfect. It's always nice when an experiment turns out delicious, right?
Oh, and while I'm on the topic, I'm going to bash fake maple syrup for a moment. It's unnatural. It's unhealthy. And most importantly: it. tastes. gross. I was raised on only have real maple syrup on my pancakes and waffles. I've tried the fake stuff (normally when we go out for breakfast) and I can't do it. In fact, I normally smuggle a small bottle of real syrup. I know I'm a syrup snob. My husband has made that fact known for years; but if the taste alone won't convince you, here's something to think about: normally, fake syrup contains mostly high fructose corn syrup. With that, it normally doesn't have any nutritional value. And while I wouldn't say you should go chug a jug of Canadian maple syrup, the real stuff does contain manganese and zinc, which can boost your immune system. Both generally have the same calorie count. Real maple syrup is mostly made up of sucrose, with a little bit of fructose and glucose.
My Smuggling Bottle
And in case you actually take my advice and go looking for syrup, here's a tip: in Canada & the U.S., a product can only use the phrase "maple" if it has a high amount of real maple syrup. It's going to be more expense, but your taste buds will love it.

So the moral of these waffles is to try to replace all purpose flour with oat flour in your next baking experiment. And use real syrup next time.

Monday, July 23, 2012

Canning 2012: Pasta Sauce

It's been a full week, my friends. I not only had to adjust to a new schedule/work load, but I got to work an extra day this week. Thankfully, I still had Sunday off so I was finally able to attempt what was once thought as impossible: make & can my first tomato sauce.

First a little background. I have absolutely, positively no Italian background, but I love me some pasta. It's almost an unhealthy obsession. The weird thing is I hate tomatoes, but I love tomato sauce. But recently, I noticed both pasta sauce & ketchup sold at the grocery store have a lot of sugar. And I'm talking like a cup or two. So, I wanted to make my own without sugar. That did not turn out too well last year thanks to the neighborhood squirrels. But this year, we have some beautiful, huge Better Boy tomatoes. And since I'm not sure how many more we'll get since there's a new excessive heat wave, I decided to start cooking.

First, I attempted to do a lot of research. And I found a few conflicting things:
- Needed 20 lbs tomatoes (not happening)
- Simmer for 2 hours (or not)
- No exact "air room" for jar
- No exact time on bathing jars
- Having water over jars (or not)

So here's what I did. And this is what I used:
- 14 better boy tomatoes right from my own garden
- 1 red onion from farmers market
- few leaves of basil from the garden
- few sprigs of oregano from the garden
- 1 garlic clove
- ground thyme
- 1/3c of Cabernet Sauvignon
- 2T sugar (I'll explain later)
- A couple splashes of lemon juice
- I'll admit it, 1 can of garlic roasted diced tomatoes
Beautiful tomatoes from my garden
So, let's first start with the pasta sauce. Getting the tomatoes ready is the hardest part. First you need to de-skin. The east way to do that is first cut an "X" lightly on the bottom and scald the tomatoes for about sixty seconds.
Just throw the suckers in boiling water for one minute
Then immediately put the tomatoes into ice water. The stress in temperature loosens the skin and makes it super easy to pull off the tomato.
See? Simple.
Then there is the not so fun part. Tomatoes are FULL of seeds (obvious) and water (not so obvious). So to make your life easier, core & quarter the tomato. Then de-seed & squeeze out as much water as you can.
Not going to lie, this felt really gross. And finding the seed quarters is like gutting a fish. Really encouraged my dislike of raw tomatoes. Bleck. But soon as you get this over with, the real fun begins: making a tasty tomato sauce.
What squeezed tomatoes with skins look like
The sauce is pretty easy. I just tossed the tomatoes into a pot & used a potato masher to break down the tomato. I also sauteed the garlic & onion before throwing it in with the tomatoes, spices, lemon juice & wine. Later on I threw in some last minute sugar because I learned a little helps the sauce last longer since it's so acidic. I'm not going to lie, it doesn't look pretty at first.
It will first look chunky yet watery.
But don't worry; over time, it will look, smell, and taste much better. I did simmer it for about an hour and 45 minutes to get some of the extra water out. And I ended up using the diced tomatoes so I ended up with more sauce. I now see why you need so much tomatoes. With my 14 tomatoes AND can of diced tomatoes, I still only ended up with TWO jars of sauce. I guess this will be more of a can as you go kind of thing.

Ok. So, about an hour or so before your sauce is ready, it's time to get your canning gear in place. Thankfully I have all I needed after my mother bought me a canning set: pot, jars, lids, rings, magnetic wand, funnel, tongs, jar rack, and a little thing that helps you get all the extra air out of the jar.
Back when I first received the kit
For each canning session, you need to get your jars, lids & rings clean. So again, about an hour before the sauce was ready, I threw the jars into the dishwasher. I also put a few of the lids & rings into boiling water. After those are clean, you'll need to keep them warm until you are ready to can. That way the jar won't crack when you put hot sauce into it & the rubber on the lid is hot and can make a proper seal.
You should also start heating up the water bath early. And take it form me, put on a lid on the pot. It takes forever to get the water boiling. And silly me, I didn't put the lid on so it took even longer. Frankly, the water didn't get to a good boil until after I got tired & put the jars in. Which I'm sure is a no-no.
Sauce reduced and is ready
So after everything is ready to go, I filled the jars right to under where the threading begins. You want to give the tomatoes enough room to expand when in the boiling bath. I used a clean towel to dry of the tops of the jars & bottoms of the lids before placing the lids onto the jars. Then place the rings only finger tight around the jar. It just needs to keep the boiling water out. You then place the jars into the bath.

I still had about 1/2 - 1 inch of water above the jars
I ended up leaving the jars in the bath for about 30 minutes. The sauce & jars were already quite warm before going into the bath. I also noticed the pressure pushed the lids up, which I hope is a good thing. And after that, I used the tongs to pull them out & set on up of a towel on the counter. I'm happy to say, both lids gave the satisfying "pop" in only a few minutes afterwards.

ta-daaaa
 I am resisting the temptation to mess them more because you're supposed to leave them completely alone for 12-24 hours to ensure a good seal. After that, I plan to test the lids to see if the move up or down at all. The suspense is killing me.

Word is after you know you have a good seal, you should remove the rings to prevent any rusting. The sealed lids should be enough. And while you can reuse the rings, you should never reuse the lids.

So that's how my first experience with canning went. Since I only made two jars, I'm sue we'll end up testing out the sauce soon. And while I enjoyed learning about using the water-bath method, I'll probably test out a pressure-system next time. Mom swears by it.

Speaking of, I ended up taking the best advice from my mother & step-mom when it came to the sauce & canning. I guess I should of just taken that route instead of getting confused online. I guess that's the moral of the story.

Now that I got my first canning out of the way, my next big attempt is making a chicken bone broth. One of my favorite bloggers, The Healthy Home Economist, writes that making & using homemade bone broths & stocks is the number one way replenish the nutrients your body is lacking. I've wanted to make my own broth for months, but now that a friend is giving me one of his chickens (that I know was well care for/fed/exercised) , I will soon make my dream a reality. But you'll have to wait another week or two. I'm actually taking a short vacation next week. With that said, I'm not sure there will be a post next week. All depends on how busy I'm enjoying a few days off. Maybe this last photo of my kitchen buddy will make up for it.
"Let me help you cook."
By the way, if you follow me on twitter, you'd know all about this fun adventure.

Monday, July 16, 2012

In Vino Veritas

Disclaimer: This week's focus is on booze. I enjoy alcoholic beverages, but am a responsible drinker. And I can only wish others are the same. Please do not judge or criticize my choices.

With that being said...

Hello. My name is Manda. And I am a wino.
But I'm still sneaky enough to have limited photos of myself drinking wine
I enjoy other forms of alcohol, but my true love is wine. Semi-sweet whites to be exact. While there were times I drank more Merlot & Cabernet Sauvignon, there's something to be said about sweet (not too tart) taste that's light and doesn't linger. My most recent obsession is Moscato (especially if they are D'Asti).

Thankfully, I live in one of the best places for a wine-lover to reside, outside of Europe & California of course. We have two wineries in our little heaven in Western Kentucky...
Wine tasting at local Purple Toad Winery with great friends
And you wouldn't believe how many vineyards are across the river into Southern Illinois. In fact, there's 32 in the southern region of the state. Even better, that includes an area called the Shawnee Hills American Viticultural Area; where there's 21 wineries and 55 vineyards. It's nationally recognized as one the most well known & respected wine regions. There's even a trail to several of these areas I wish to travel one day. But until then, I will just keep visiting one of the best: Blue Sky Vineyards. We actually took one of my best friends from from Central Illinois there this weekend.
Good Wine, Good Food, And Great Company

So in between my love for fermented grapes during dinner and how often we socialize, we go through a lot of wine bottles. And most of the time, we just end up recycling. But I thought I would share a few ways that you can use left over wine bottles.


The first idea we stole from my husband's lovely parents a long time ago: we use an old wine bottle to carry dish soap. At the time, his parents picked out the bottle for us to use, but you can always try any left over bottle of your favorite wine... or any beverage for that matter.

Another good use that we are now trying out is watering the plants. It's a cheaper version of the watering globe they sold on TV years ago. It can also hold more water & is more durable since the glass is thicker. You pretty much wash it out, fill with water, then shove into the ground. The soil does the rest.
Not only do we hope it can help save the squash, but now my garden can drink with me
There are other great uses for wine bottles when it comes to home decor'. You can paint them, put lights or candles in them, reuse them with other beverages, use them as vases, use them as yard torches, I've even found a few links about cutting some of the glass to make cool designs. I plan to try that if I find enough bottles with colorful glass. I also need to get my hands on chalkboard paint eventually- buahaha.
I love the sight of a vineyard as sunset
So raise a glass to the never-ending enjoyment of wine. Even the mayo clinic notes that red wine (in responsible, moderate amounts) can help the cardiovascular system. The antioxidants in red wine may help protect the lining of blood vessels in the heart. One antioxidant - resveratrol - could reduce bad cholestrol & has shown to reduce the risk to obesity and diabetes in mice. Unfortunately, I can't say that includes my preference of white wine, but it is still a good beverage choice in moderation. And both red & wine wines can bring great additional flavors to certain dishes in the kitchen.

And what's the wine bottle without the cork? I'm currently trying to store up corks to make an pot holder. And thanks to one best friends, I now have an awesome container for the corks. I'll be sure to share how it all turns out.

Awesome, right?
And if you happen to end up using the bottles for your home & garden, you may avoid the risk of looking like an alcoholic come recycle day.
IN MY DEFENSE- there were mostly beer bottles. And it was after a HUGE house party. DON'T JUDGE ME.


Monday, June 25, 2012

Feelin' Hot, Hot Hot

So needless to say it's hot outside. Where we live, we are dealing with a severe drought. In fact, it's been roughly two weeks since we last had any rain. And my super-awesome-chief-meteorologist-friend says our rain deficit is more than a foot. Sunday was the hottest day of the year for us so far. So yeah... It's hot. And dry. And miserable.

This is where I want to chime in with an "I told you so." Last winter, everyone thought I was crazy for my concern about our very mild winter. And now we've had the driest Spring (and possibly Summer) in the books. Not to mention bugs (including harmful ones) are hideous this year since they all didn't die during winter. Believe it or not, there are reasons to like the cold.

But I must save a more in-depth rant on that for later. What we need to focus on is now. That includes us trying to figure out how keep cool and our garden alive. Let us first get to our plants. Over the last couple of weeks, we've moved about everything we can to the front porch so the plants have some relief from the unbearable sun. It's a quick fix and frankly, all of those plants are doing better than the ones in the garden beds. We moved the basil to get even more shade after it showed signs of suffering. So even full-sun plants are hurting from this heat.


Mint, Marigolds, Calendula, Chamomile & Echinacea
We are also dedicated to watering every thing every morning. I used to water in the evenings, but all the water would absorb during the night and leave the plants to wilt throughout the hot days. The morning watering is helping, but you can tell the zucchini and squash aren't as delighted as when it fully rained. It doesn't help that our backyard is north-ish facing so it's getting all of the sun throughout the majority of the day. But hey, some of the dryer plants like the lavender & sage are loving it.

When you do water , focus all of the H-2-Oh on the roots around the stem. Try to avoid hitting the leaves with water. That can lead to the leaves getting sunburned during the day or even bring disease and mold if you water at night. So I always try to just water at the base of the plant. If you can, also pour water away from the plant since most root systems branch out, not down.

But my purple bell peppers aren't the only living beings trying to survive this summer. So here's a few ways to keep cool:

- Wear loose-fitting clothing that's a light color
- Wear Cotton. It's lighter, more breathable, and helps our own perspiration
- Use Fans. They help circulate and cool the air even with Air Conditioning

Here's a biggie- focus on your feet. 25 percent of your sweat glands are in your feet. And that little fact can bring several options when it comes to cooling down. Of course there's the obvious use of breathable sandals over shoes. And if your dogs are hot, try either freezing a damp rag or place a bottle of lotion in your fridge that way you can apply it to your feet to cool down after a long, insufferably hot day.

With that in mind, you can also chill a wet bandana that you can tie on if you plan to work out in the yard. A long time ago when I rode & showed horses (long story), we would dump our shirts in cold water and put them on to cool off during our work days.

Water is another biggie for the hot summer months. So drink it up... with bottles of water that is. But sometimes you need more of a re-hydration boost. Even if you didn't run a marathon this afternoon, if you were out and sweating a lot, consider taking in some electrolytes. That can come from various sports drinks, but the latest "all natural" option for that is coconut water. Coconut water is fat free and low on calories while providing some potassium and sodium (key to serious re-hydration); but it's not the best thing out there. The levels of potassium and sodium are par. It doesn't really offer anything amazing compared to everyday intake of fruits and vegetables. Just sayin'.

You should also avoid taking in anything that can cause dehydration like caffeine an alcohol. Also just sayin'.

Since we are talking about what you consume, eat small. That includes smaller, more frequent meals or snacks. That prevents your body from working overtime to digest and metabolize. Nibbling on cold, water-based fruits like watermelon and grapes is a great summer pastime. And while it sounds crazy, eat spicy food. That helps produce sweat which helps you cool down. Sweat and hydration is key.

I have one last tid bit for you to keep in mind during this summer. And it's an amazing idea I saw on pinterest (of course). If you get a sunburn, try freezing & applying cubes of aloe vera. All you need is true aloe vera and an extra ice cube tray. I almost want my husband to get sun burnt so I can try this. But I shouldn't increase his risk for skin cancer just so I can use a cool pinterest idea... or should I?

Either way, keeping cool and hydrated are crucial for you and your garden during the hot summer months. And with June being this unbearable, I am really afraid of what August will be like. But at least you don't have to be in a drought to enjoy all these great tips on beating the heat. With that, sit back next to a fan, open up a chilled bottle of water, and stay cool my friends.

Monday, May 7, 2012

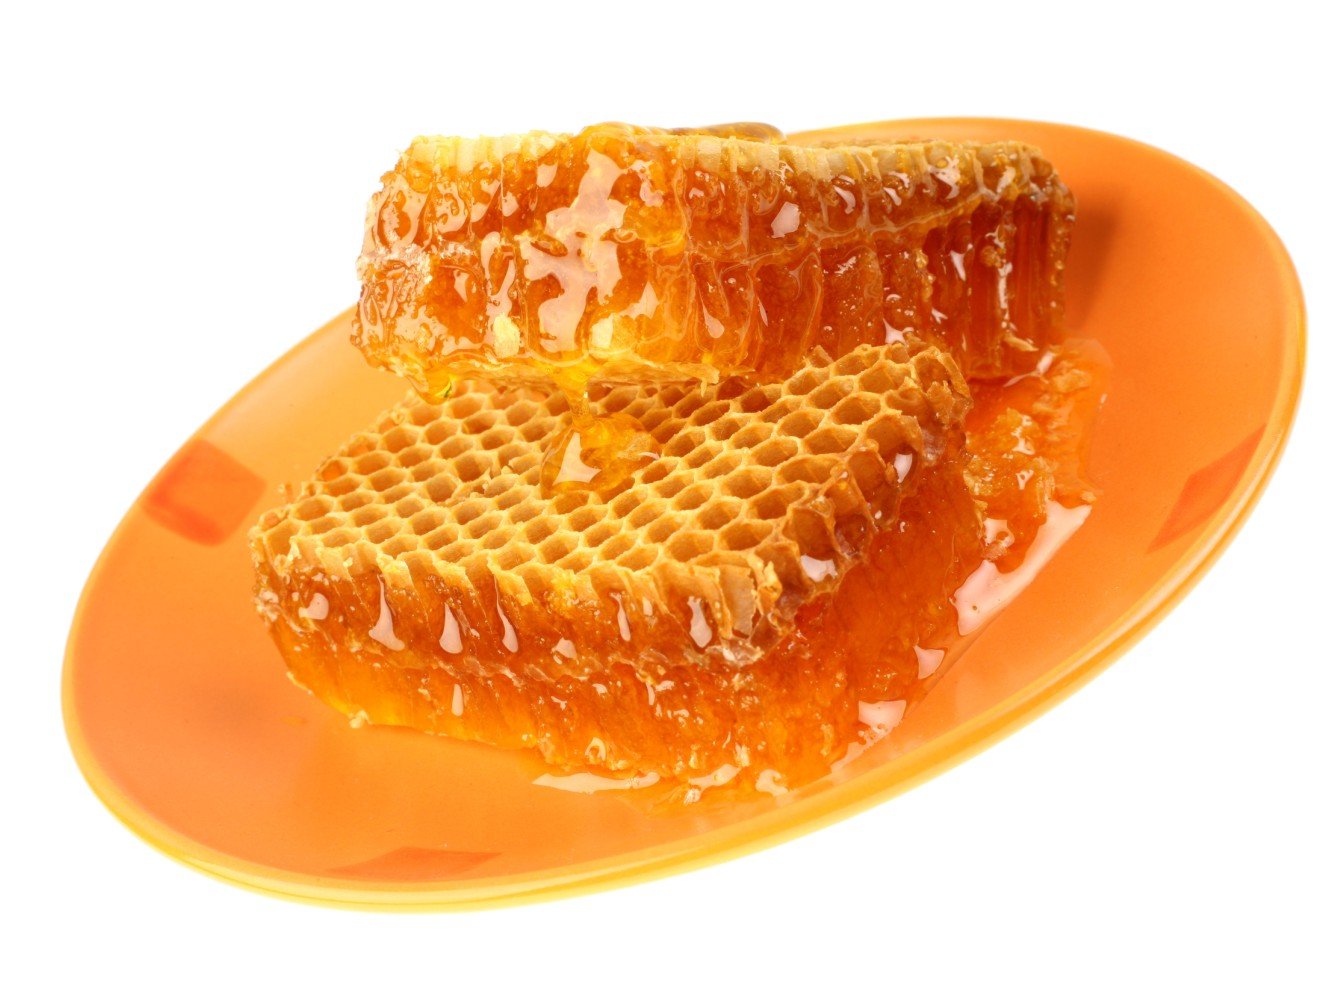
A Taste Of Honey

Sorry if you're getting tired of all the food blogs, but I can't help myself. But then again, food is an important part of our lives that should be highly considered. But enough of my soap box. I wanted to share another local, green, tasty product that we didn't really understand until moving to Western Kentucky: Honey.
From a general google image search. It's from some global market site.
Honey is an amazing natural sweetener. While it has more calories than sugar, it is more digestible and contains b vitamins, calcium & magnesium. It is an antioxidant and has antibacterial & anti-fungal properties. And it can cure what ails ya.

Here are just some of the things honey can do:
- Heal Cuts & Burns
- Soothe & Treat Sour Throats- check out this video for a honey cough syrup from Learning Herbs
- Conditioner for Skin
- May even help your body repair damaged cells from colitis

But the biggest claim to fame is the folklore that it can help reduce springtime allergies. There are plenty of sites out there (for and against) the theory that eating local honey is similar to a process called immunotherapy. That's when small, but several exposures of an allergy are given over time, in hopes your body develops an immunity.

Immunotherapy is normally in the form of allergy shots. Back in college, I tried this treatment, but it's painful, inconvenient and costly. For the first few months, I had to drive 60 minutes round trip twice if not three times a week to get a shot filled with what I'm allergic to. Then I had to wait at the office for a good 15-30 minutes to make sure I didn't have a deadly reactions. After a few months, I was able to take the serum to my school's health department and get the shots once a week there... but I soon let that slide. I've talked with other doctors over the years about trying again, but my current insurance will charge me a co-pay for every single trip and that's not doable.

So needless to say, I'm up for trying anything to relieves my allergies in the month of April. As I said, I've tried shots, I always take antihistamines, and I even had nasal surgery to widen the passages after getting pneumonia from a sinus infection brought on by allergies. I may even try Helminthic therapy if my allergies got bad enough. But there's a few easier things to try first. Last Spring, Roxy made the suggestion of eating more local honey. I figured I would try it. Who wouldn't pick devouring sweet honey over deliberately infecting yourself with hookworms?

First I will say, many sites including webmd argue honey cannot help allergies. Mostly because spring allergies (including mine to trees) come from pollen that's from non-flowering plants. And since bees only go to flowers with nectar, they will only get tree, grass, or weed pollen by it being blown onto them by the wind. So it's in very small amounts if there at all. Reasonable enough argument. But that's the harm in trying?

With in the past year, I've included local honey in my diet through tea. I've even developed a slight addiction to chamomile tea with honey (oh so good). And I've gone through maybe five or six jars/bottles. I have to say something worked. I was still taking my normal medication & (infrequent) nasal spray and did have a few days of constant sneezing and itchy eyes. BUT I didn't need a cortisone shot nor did I get a sinus infection (which happens about every year) so I think I fared out pretty well. Which is odd because many were saying this year's spring season would be awful since winter was so mild.

As in every ailment, there are too many variables to find causation. Maybe this year wasn't too bad when it came to the pollen I'm allergic too. Maybe I'm growing out of my allergies. Maybe I finally avoided the outdoors enough to not be bothered. Maybe I finally got myself into doing the nasal spray enough. Or it could be all of that mixed in with local honey. Either way, I think I'm going to keep up the habit of enjoying some local honey with chamomile tea.
Thankfully there's lot of honey to choose from down here. There's at least three local places that I can count off the top of my head. One lady sells her honey during the farmers market. And even better, she sells cubes of beeswax. I bought a few blocks the other day in hopes of making some balms and salves later this summer. I can't wait to try/show you all that.

Monday, February 27, 2012

Preparing For Spring Part One

As we begin to wrap up the month of February, it seems about everyone is ready for Spring to bloom. That is, except me. March normally brings a mixture of emotions for me. While I'm ready to get outside & enjoy longer days, I normally have to spend the first few weeks of spring miserable and inside.

You see, tree pollen and I don't get along so well... in fact, we are mortal enemies. Every year, I dread the month of April because my days are full of sneezing, itchy eyes, and short breath. And it gets really awful some years. When I lived in college dorms with open windows, spring would get so hazy that I would have to go home during the weekends just so I could sleep.  In 2008, my allergies lead to a sinus infection that was so bad, it turned to pneumonia. But since I assumed it was just allergies, I let it get to a point where I was hospitalized for a few days. I'm thankful that I don't have allergies all year, but every spring is full of allegra, eye drops, inhalers & normally a dose of steroids for a week.

As I learn more about my allergies, it gets a little better every year, mostly because we know how to avoid it as best we can. Our windows & doors stay shut until May, I start on meds in February, and I try to be outside as little as possible. By no means is any of that fun, but it's better than the alternative.

So with all that being said, I never really "look forward" to Spring. Mostly because I know the next month or so will be agonizing. I also know I'm one of the very few people that feel this way. My coworkers give me glares every time I say anything in relation to my conditioned hatred toward spring blooming from winter.

But this year adds a new concern. Winter was really mild this year. In our little city, it only snowed three times all winter. An none of it stuck around for long. And while I enjoyed the warmer temperatures as much as the next person, it isn't right for winter to be so mild. Especially when this same area was hit by a dramatic ice storm just three years ago. Where we live, there's supposed to be a time for life to sleep then re-awaken. I'm truly afraid bugs & pollen will be a disaster this spring. And while I'm not a meteorologist, I'm interested to see what summer will be like this year.
I was so excited that it finally snowed at the end of November, I took a photo
But I'll get off my soap box and get back to the fun stuff. Spring does mean at least one, very fun thing: gardening. Each year the husband & I do more gardening than the year before. And last year was pretty fun. We grew tomatoes, lavender, onions, peppers, mint, oregano, rosemary, and some mutant basil. I documented a bit of our journey, including in uncharted territory.
Last year's garden on the first day. It all grew so fast
But this year will be even better. After reading into herbalism, I'm already planning the herbs I want in my garden. In fact, we just bought some seeds & a cell kit to start a few of our main herbs.
I'll finally have some calendula at my disposal
And while I'll have every herb from mint to oregano, we are also planning on some strawberries, peppers, tomatoes & maybe even a pumpkin. But my dreams of a big batch of chamomile, echinacea & calendula will have to wait for things to warm up more. And it will all depend on when we finish up closing on this home we want to buy. But that doesn't mean we can't all start preparing for a great growing season. Thanks to the cell system we bought, we already started on germinating seeds.

 So here's a few things you can start doing now.

- Like I did, make a list of what you want to grow this year.
- Take a look at your yard & map out the space. Be sure to include how much sun a certain spot is getting.
- If you plan on growing plants from seeds, go ahead and start them in your home.
-  You don't have to get a cell kit like we did. You can save money & use things like margarine tubs, tuperware or egg cartons.
- Slowly start purchasing what you'll need for your outside garden. A couple bags of soil here or there is a lot better then buying 20 when you need it.
- Don't forget to compost.

If you are ever looking for some gardening inspiration, I am constantly updating my secret garden board. There are so many cool things on there that I'm not really at liberty to post here.

Well, March is just a few days away, which means Women's History Month will begin. And you can bet your bottom dollar that I have a theme planned. Want to guess what it is? I'm sure you have an idea. See you then.